Chassis, Suspension, and Brakes
Part 1: Disassembly of the Chassis, Suspension, and Frame

Just one example of the many paint or
grease pencil markings you might find on your Chevelle. These particular
yellow paint markings are very commonly found on Chevelle 12 bolt differentials
as well as others to denote the placement of the pocket welds that held
the axle tubes into the center carrier. These were done before the welding
took place evidenced by the burned paint around the weld.
You may find many paint or grease pencil markings throughout your
chassis and even in places on the body. These were placed there
for a variety of reasons. Most of the time it helped the assembly
line pick the part that went on that particular car based on color
markings. Other times the independent supplier marked the items
as they were being manufactured or assembled to denote things like
bolts that had been tightened to spec, heat treating was performed,
machining that was completed, placement of welds, inspections that
were done, etc.
In a lot of cases such as front suspension paint markings there
seems to be no rhyme or reason as to their application and seldom
are any two alike in either color or placement. You are best to
replace what you found exactly as you found it backing it up with
photo documentation of where and how it looked. Restoring one of
these cars is much like what an archeologist goes through when unearthing
a treasure. The utmost care and patience needs to be used to preserve
and document everything that was found to help solidify your cars
roots and provenance. Some restorers duplicate those found on the
firewall; in most cases these would have been painted over during
assembly and not visible for years afterward when the paint began
to fade. Paint daubs on the chassis do tend to be more permanent
and can easily be duplicated if/when you photograph and document
them.
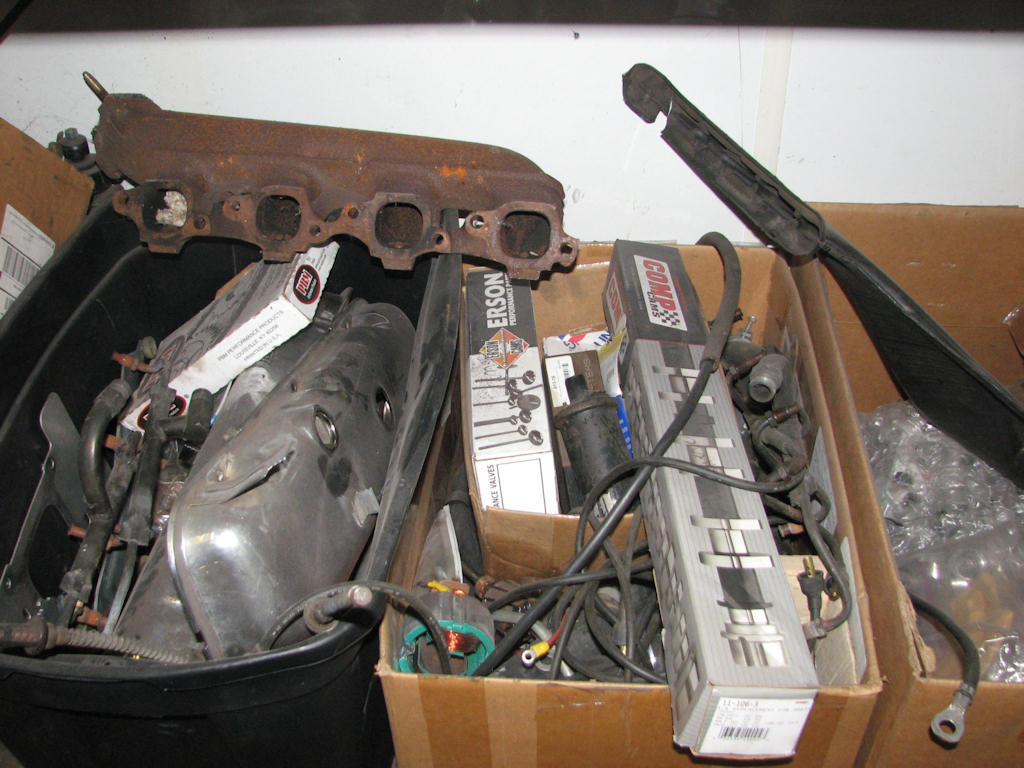
Keep all the old parts in a separate tote
during the restoration even if they are not salvageable. There are many
small pieces off these components that can be reused if the replacement
component parts are not to your liking or don’t fit. You can also use
the original parts for comparison to the replacement ones. If you are
restoring a car for a customer, let them decide what gets thrown away
and what they may want to keep.
As with most areas of the restoration, and with rare exception,
save all your old parts that you know you will not be using in the
restoration in separate bins marked as such. This way you can refer
back to them if you are having fitment, function, finish or design
issues with the replacement parts. Sometimes comparing the new to
the old will solve a problem. Just as importantly, you can sometimes
take pieces off your old parts and use them along with the new parts.
Even completely unsalvageable parts like weather-stripping can provide
you with little things like the small white push pins if you come
up short or they went missing from the new weather-stripping package.
If you are restoring this Chevelle for a customer it is a good idea
to keep all their parts until the car is ready for delivery thereby
allowing them to make the final decision to throw parts or to keep
them. In the case of a highly valuable collector car these original
parts can also add to the sale and story of the car if or when it
comes time to sell it. Broken parts such as a transmission case
or exploded differential housing can round out the picture in a
story of how the transmission came apart just as you slammed second
gear while being a car length in front of your opponent. It will
also prove the beginnings of the car since you will still possess
the original part with the car’s VIN number on it even if it cannot
be used. In most of the do-it-yourself restorers’ cases you just
need to keep them for reference and pieces or parts salvage.
Suspension Disassembly
Now it is time to start the disassembly in earnest. First, make
note of any shims located in the front upper control arm area. This
is one very good way to determine if your frame has been involved
in any significant damage prior to now. If you notice significantly
more shims on one side when compared to the other or a lot of shims
on both sides, this is a likely sign of a pending frame alignment
issue. Another sign of severe damage is if the upper control arm
shaft has been replaced with an offset shaft to make up for more
needed camber or caster. If the car was ever in an accident where
the frame was knocked out of alignment, the frame and body shop
would have to compensate for that alignment issue with the use of
shims and/or replacement cross shaft assuming they were not able
to pull the frame back to its original state. When the frame is
totally disassembled and with a GM frame dimension sheet in hand,
this would be the time to have the frame brought back to its original
form.
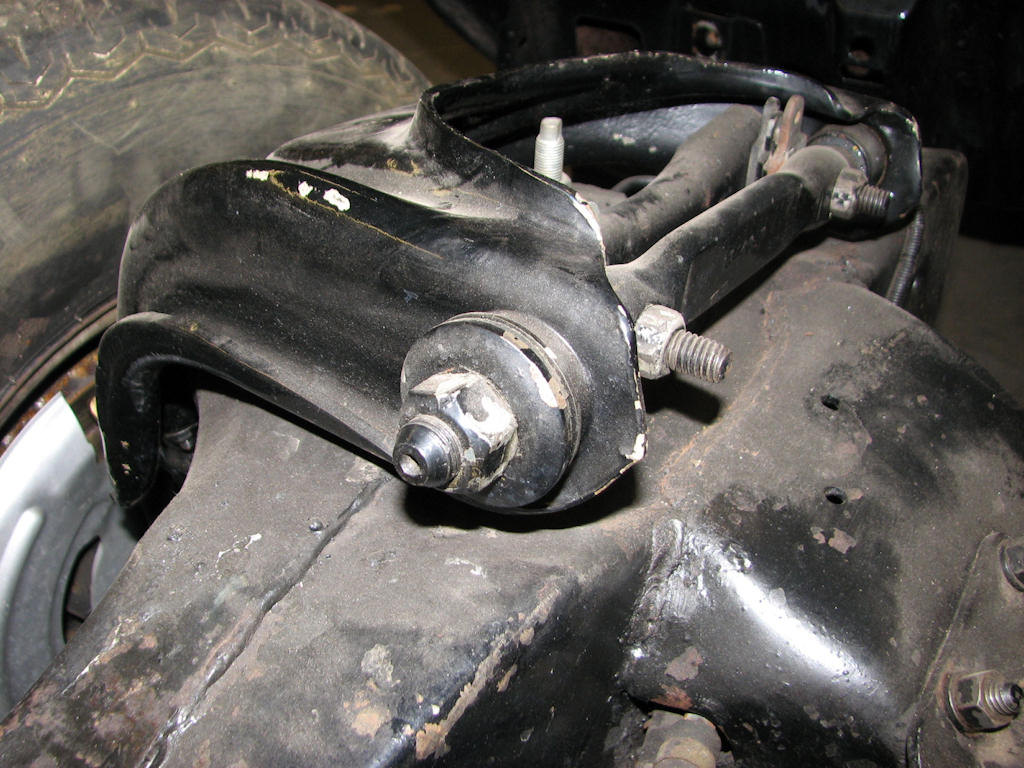
Note the excessive amount of shims used
on this upper control arm which is usually a good indicator of other
damage somewhere in the frame or suspension. The cross shaft shown here
was also not used on the Chevelle but was used on other GM A-bodies
so this is another indicator that someone has replaced some suspension
pieces, likely because they were bent.
Also look for any obvious wrinkles, tears or broken welds on the
frame as this is also an indicator of extremely hard usage or damage.
These issues will also have to be addressed during the restoration
to insure the car will sit and ride according to the manufacturer’s
specifications. It is rare that a fifty year old Chevelle would
not have been involved in an accident or drag raced in its lifetime
so this will more often than not be the norm.
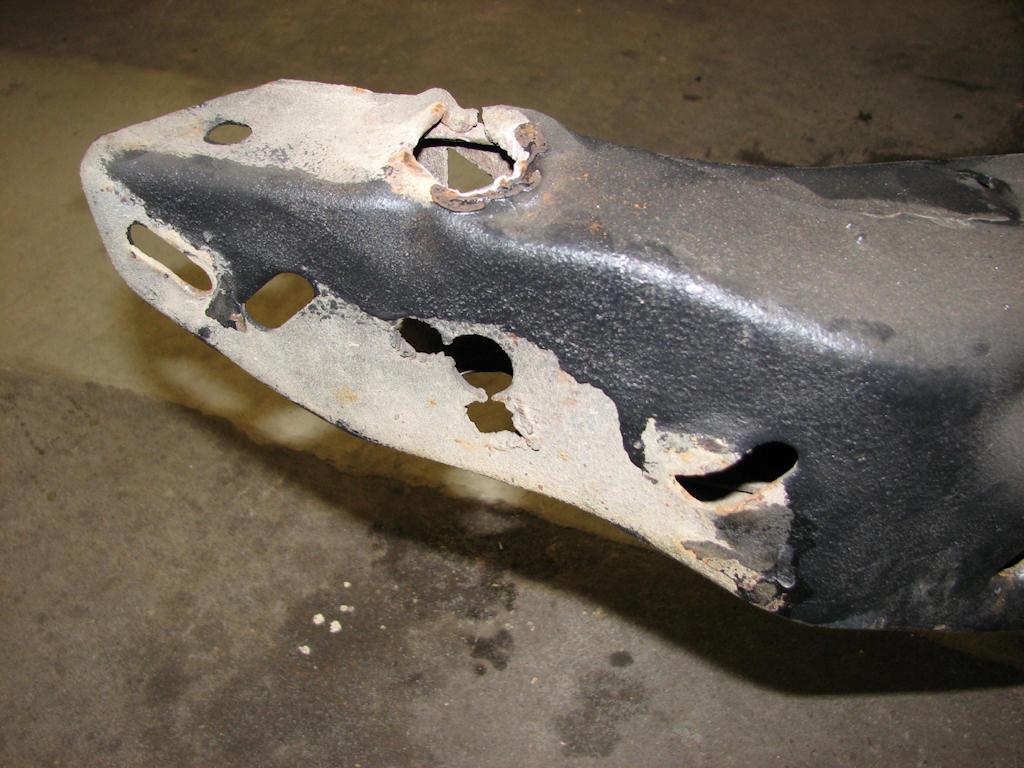
This particular frame had seen severe
use and damage in its lifetime due primarily to drag racing. Notice
the pulled and stretched oval tie down hole, the badly damaged and rusted
core support mounting hole on the top and several holes drilled and
then damaged in the inside rail. Dents found in the frame like the one
near the core support mount often lead to more severe damage elsewhere
that needs to be addressed before you can consider any body work and
paint on the frame.
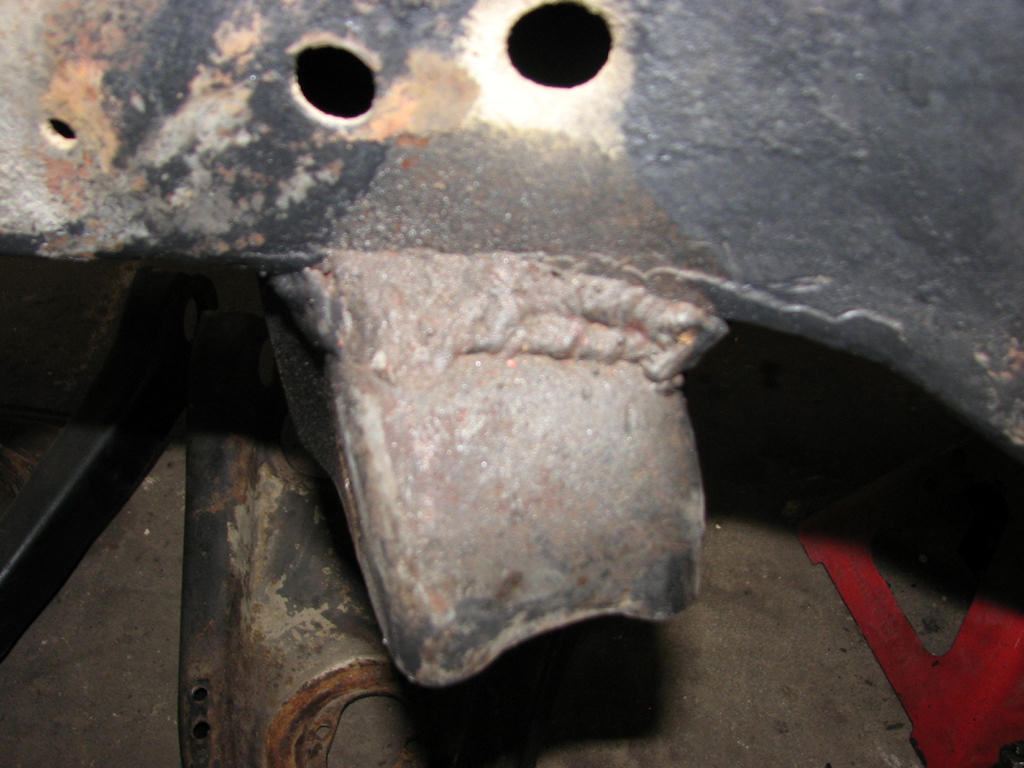
Some less than quality shops will try
and repair cracks in suspension mounts using less than stellar welding
techniques. As can be seen in this photo it did not stop by simply welding
and the crack just continued down the frame. When not addressed in the
correct manner it can lead to catastrophic results.
Pay close attention to all parts of the frame during disassembly
such as the rear differential, rear crossmember, control arms, trailing
arms and frame to name a few for signs of damage as these will all
have to be addressed during the restoration. Especially, look for
things you would normally not even consider looking for in most
cases like axle tube damage. A badly or heavily abused car may have
axle tube twist or separation and you or your mechanic must address
these during the rebuild.
Chapter 4 - Chassis, Suspension, and Brakes
© Chevelle Restoration
|


 |





