

Chassis, Suspension, and Brakes
Suspension Removal
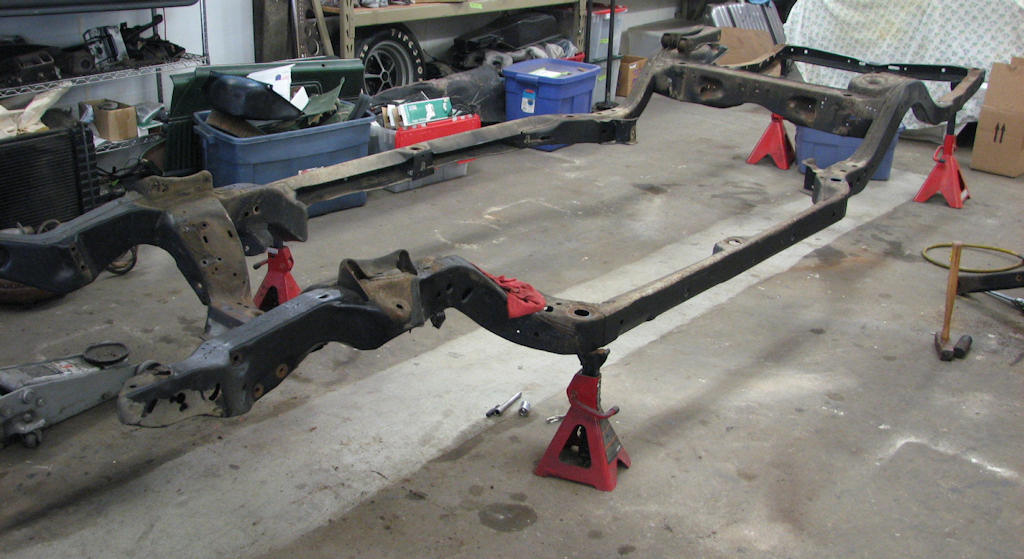
This is usually the best location to
place the jack stands under the frame to keep them mostly out of
your way during disassembly when removing both the front and rear
suspension. Be very careful not to accidently lean on or move the
frame while disassembling as this could cause the stands to move and
the frame to fall off causing severe damage and injury. Shown here,
a completely disassembled frame to give an unobstructed view of the
locations as to where to place the stands.
From this point place the frame on jack stands in four locations or better yet using a 2 post lift if you have one available. Start by placing the jack stands on the front and rear corners of the main frame rail under the door area or else two at the rear of the frame. Raise the frame so that the tires are just off the ground. I have found that this will best support the frame, the stands are for the most part out of your way and you can remove the tires when the time comes without jacking up the frame. If you are using a car lift, this will work even better as you can raise and lower the frame to better suit the area that you are working on. When using the lift, strap the frame to the hoist arms for added security.
Now that you have documented everything and stabilized the frame, you can remove the wheels and tires. Once you have them removed and neatly stacked out of your way, start removing all the frame component parts. In what order you do this is entirely up to you. However, it is best to get the bulky and heavy items out of the way first such as the front and rear suspension which allows for a little cleaner access area to the rest of the components to remove them later on.
Rear Differential Removal
The rear differential is the next major component to remove. If not previously done, now is the time to remove the rear cover and drain the differential fluid. It is best to drain it through a strainer so that you can retain any filings or metal chips which will help you to determine if there may be an issue with the internals of the differential beyond normal wear. This will have to be addressed with a potential complete overhaul. You need to also take note if there is any water or other foreign material in the differential lube. We will cover differential overhauling later in this chapter. Start by placing a drain pan under the differential and slightly loosening all the bolts on the cover. Leave the top couple of bolts a little tighter which will allow the fluid to drain but not gush out and cover you and everything else with fluid. Once the fluid has been drained, put all the bolts back into their respective holes and slightly tighten them for the time being until you address the differential overhaul.

Cars that came equipped with the F41
suspension option will have a reinforcement plate spot welded onto
the driver’s side upper trailing arm. It will always be on the upper
driver’s side.
There are two upper and two lower trailing arms as well as the flexible brake line, emergency brake cables and sway bar that are attached to the rear differential. The frame is already being supported by jack stands so you can use a floor jack under the differential to support it and later for removal. Before placing it there remove the four bolts holding the sway bar (if so equipped) to the lower trailing arms and remove the sway bar out of your way. Note the quantity and placement of any shims between the trailing arms and sway bar attaching points if any were present.
Place the floor jack under the differential carrier and use a strap
to hold it so that it cannot roll off when separated from the
trailing arms. Remove the two butterfly clips from the front of the
parking brake cable attaching points outlined earlier and pull the
cables through the hole and out of the way. Lift the differential up
until it starts to raise the frame. This will take the load off of
it and make it easier to remove the bolts. Moving onto the upper
trailing arms, remove the four bolts from the attaching points at
the differential. On F41 equipped cars make sure the heavy duty
reinforcing tab is there and take note of which side it is located.
This particular arm should be attached on the driver’s side.

When removing any of the suspension
always make note of the bolts, nuts and washers. The front lower
rear trailing arm has unique hardware from the integral washer
headed bolt to the washers found under the frame reinforcement bars
if so equipped. You will usually only find one washer per side but
in this case there were two. Also note the direction of the bolt.
Move onto the lower trailing arms and remove the two front and two rear bolts holding the trailing arms onto the differential. On heavy duty suspension cars you will have an additional frame reinforcement bar that mounts to the front side of the bottom rear trailing arm and runs up to the front top mount of the rear upper trailing arms. Remove these at the same time as you remove the bolts. Take special note of the types of bolts and their orientation when removing them as all the rear suspension bolts need to be installed in the correct direction. Also make note that the frame through bolt holding the lower trailing arm to the frame gusset in the front of the trailing arm is different than any other suspension bolt as it has an integral washer head on it whereas none of the other ones do. You should also find large washers under the stop nuts on cars equipped with the frame reinforcement bars attached to this same point. Check all four trailing arms for bushing wear to the point that the through bolt has worn through the bushing and into the trailing arm. If you find this, the arm will either need to be replaced or if the damage is minor than some welding and grinding will be required.
Lastly remove the clip and remove the brake flex line from the upper rear crossmember area. It is best to put some sort of cap or plug in the line so you do not drip brake fluid everywhere. Now that you have the differential completely loose, remove the bolts and either leave the differential on the floor jack or transfer the differential onto an inexpensive four wheel caster dolly and push out of the way for the time being.
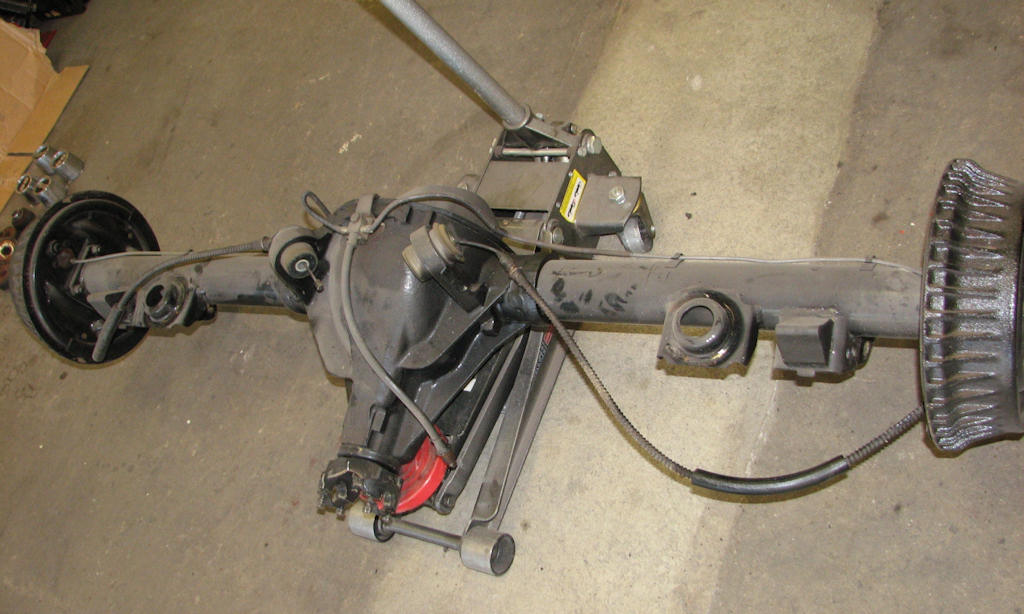
After removal of the differential from
the frame you can either leave it on your floor jack for the time
being or move it to a small caster cart to make it more mobile and
keep it out of your way. If you are not going to be doing anything
to it for a time simply store it out of the way.
If you are using a two post hoist you can simply lower the frame until the differential is sitting on jack stands or that same cheap caster dolly, remove all the attaching hardware and then lift the frame up and away from the differential using the hoist.
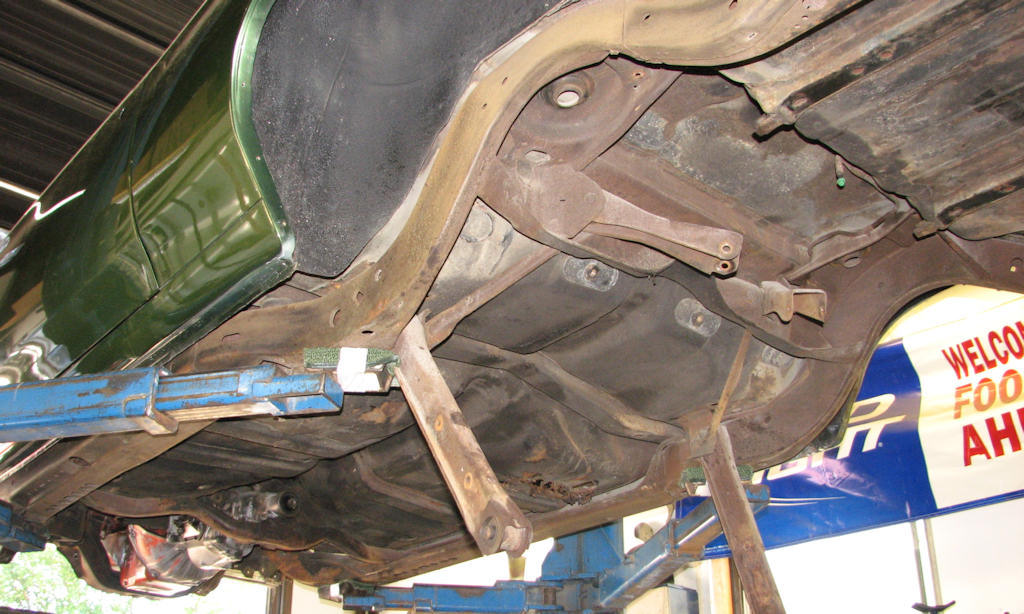
If you have access to a 2 post hoist
simply lower the hoist near the ground and remove the bolts holding
the control arms to the rear differential. Place the differential on
a small 4 caster dolly and move out of the way. Then simply raise
the frame back in the air and remove the balance of the rear
suspension pieces where they are easier to work on.

Remove the snubber and bracket from
the frame. Pay attention to the orientation of the bolts though the
author has never seen them mounted any other way than the bolts
installed from the rear of the crossmember and facing the front of
the car.
The last thing you need to remove now that everything in the rear is out of your way will be the pinion snubber. This is held on the crossmember by not only two bolts, nuts and washers but also a nut holding the pinion snubber through the crossmember and into the snubber bracket. Remove the hardware, snubber and bracket and place in a separate bag. Also note the original finish of the pinion bracket as I have seen both natural steel and black dipped.
| Chapter 4 - Chassis, Suspension, and Brakes © Chevelle Restoration |


 |



