

Chassis, Suspension, and Brakes
Front Suspension Removal
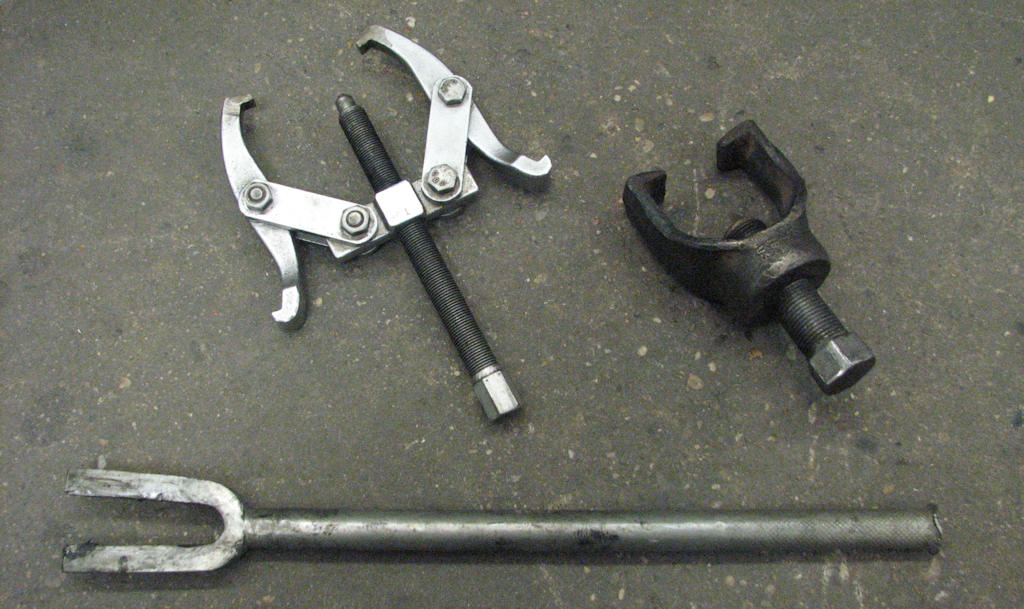
These are just some of the tools that
can be used on the front suspension to remove tie-rods, pinion arms
and other pieces. The use of these tools will allow you to safely
remove the part without damage to it or its associated parts other
than the pickle fork which should not be used unless you intend to
replace everything.
Moving onto the front suspension, this will be the last major component to remove from the frame assembly. It is best to remove all the small components first such as tie rods, steering arms, center link, idler arm and sway bar to get them out of the way before you move onto the bigger parts. This would also be a good time to check most of the components for wear or other defects. Check all the tie rod joints for looseness by having a buddy turn the steering wheel back and forth about an inch while you hold your hand around the joint, testing one joint at a time. If you feel any clunking or obvious looseness make note of that item so it can be replaced during your restoration. Ball joints can also be tested at this time but it is recommended you automatically replace all bushings and joints if doing a full restoration. You have the car completely apart so why take a chance on a fifty year old part but instead replace it with a new and solid piece which should give you many years of continued service.
Separate the sway bar from the sway bar end links. Bag and tag those pieces like you have been doing. Now carefully remove the sway bar brackets from the frame. If you have a friend helping you have them hold the sway bar as you remove the brackets. If not a floor jack placed in the center of the sway bar will hold it in place while you remove the hardware.
Remove all the cotter pins from all the attachments points on the articulating suspension pieces. Then loosen all the castle nuts. Leave them attached with a few threads so that when the parts are separated they do not simply fall to the ground. Removing these joints can be tricky. It is best to use a tool designed specifically for tie rod removal so as to limit any damage to the tie rod or boot. The pullers are the best tool to use as they will not damage any part of the joint whereas the pickle fork will most certainly damage the boot. It is also not recommended to use any type of hammer to remove the joints unless you intend to replace them as this will not only damage the outside of the tie rod but in some cases will actually distort the tapered joint that the tie rod knuckle fits into. Heat can also be your friend here but caution needs to be used with regards to the boot as well as any combustible material nearby. If you are replacing the boots than this is a good option to use along with one of the tools shown.
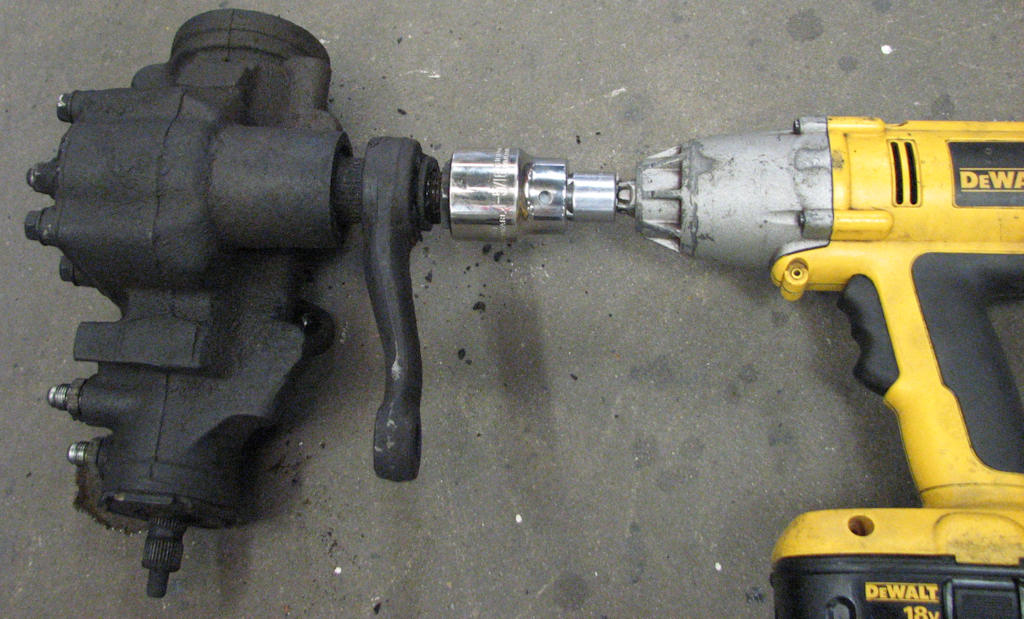
Using either an electric, rechargeable
or pneumatic impact wrench will greatly simplify the removal of the
pitman arm nut. Without it you may have your work cut out for you
and could likely damage the internal gears of the steering gear if
not done carefully. These are usually very rusty so it is best to
pre-soak it in penetrant before making an attempt to remove the nut.
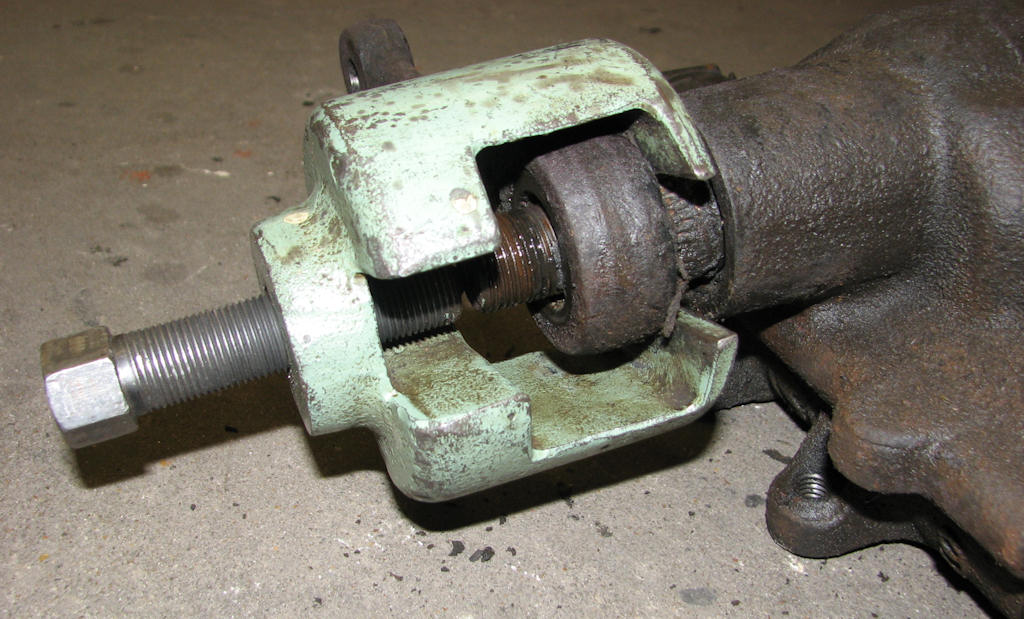
It is imperative that you use the
correct tool for the job especially on something like the pitman arm
removal. Use of incorrect tools will lead to potential damage and
costly repairs if care is not taken. With the pitman arm tool
getting the arm off is a snap.
Once you have the tie rods removed, loosen the drag link (or center link as many call them) joints at the steering gear pitman arm at the driver’s side and the frame mounted idle arm at the passenger side using the same methods and procedures that you previously used on the tie rods. It can be difficult to remove the drag link with the steering gear attached as the drag link will hit the protruding frame center section so it is best that you now loosen the steering gear so you can move it around and remove the drag link joint. Regardless of which steering you have, be it power assisted or manual, remove the pitman arm nut and lock washer and set aside. If you do not intend to rebuild the steering gear it may not be necessary to remove the arm and you can ignore this step. It is best and far easier to use an impact wrench and a 1 5/16” socket. If this is not available and you must use a large wrench, it is imperative that you do not turn the arm all the way to the steering gear stop as this will likely damage the internal parts of the steering gear. Using heat here will also sometimes help but damage to the shaft rubber seal is likely so unless you intend to rebuild the gear do not use heat in this area.
Remove the three through bolts going through the frame and into the side of the steering gear. This may require a helper to hold the steering gear from falling while the other removes the bolts. This is a very heavy unit so be prepared to catch it as the last bolt is removed. These attaching bolts can sometimes be rusty so both heat and a rust penetrant can help you here. Once the gear has been separated from the frame, remove the drag link to pitman arm joint and place the steering gear out of the way for now. You have already removed the large pitman arm bolt and lock washer so now you can remove the pitman arm. Removal of this arm will almost always require a removal tool to separate the arm from the shaft so as to not damage either part. Using any other method may cause damage.
Now you can remove the drag link and place out of the way. This will leave only the idle arm which is attached to the frame with two bolts and lock nuts. Using a long extension and 9/16” socket, insert it through the frame while holding a 9/16” wrench on the lock nut side. It is easier to remove the nut first and then carefully pull the bolt out of the frame using your socket or better yet a magnet as these bolts can sometimes fall down into the frame and retrieving them can often times be difficult. Use caution and patience here.
| Chapter 4 - Chassis, Suspension, and Brakes © Chevelle Restoration |


 |



