

Chassis, Suspension, and Brakes
Part 2: Restoration and Assembly of the Chassis, Suspension, and Frame
Congratulations, this now marks the completion of your frame disassembly and the beginning of the restoration of the frame and all associated bolt on hardware items. Here is where the excitement begins, restoring all those items. This is where you will see the fruits of your labor and the excitement build.
Frame Restoration
For ease of understanding lets restore the frame and chassis basically in the same order you disassembled it. It was touched on earlier but the very first thing you will want to do is examine the frame and determine if it is the right candidate for restoration. If it has any major issues such as rust holes, major bends or crack, it may be a good time to locate a good donor frame to use for your project. Frames for Chevelles do vary slightly between years and there are also differences between the body styles such as coupe, wagon, convertible, El Camino as well as 2-door versus 4-door, etc. so make sure you are replacing it with the right donor. In most cases you can also use a frame from another GM A-bodied car.
Frame Cleaning
It is best to take your frame and sand blast it or use other means of media removal such as aluminum oxide, walnut shells or plastic media. Sand and aluminum oxide are usually fairly inexpensive and not very time consuming and allows you to start with fresh bare metal as well as rust removal unlike some forms of media blasting that will not remove rust. There are other means of paint removal but most of them are very time consuming or expensive. You might also want to consider hiring a company that will do on-site blasting with their equipment though your local surroundings will dictate if this will work or not. There are also several varieties of these services as well including high pressure water, walnut, glass, plastic media, etc. If you are not close to a blasting facility you can purchase a do-it-yourself compact blaster for little money though a fairly high volume high SCFM air compressor would be necessary. If you are using Silica sand you must also use a fresh air hood and blast upwind of your project. For the best bang for your buck and regardless if you are doing the work or farming it out, you are better off if you put most the parts that need blasting aside and wait to do them all at one time. It is not suggested to sand blast any large sheet metal items however as warpage can be a major problem. If forced to, turn the pressure down as low as you can and still remove material. This will help by not heating up the metal as much.

Before hiring a blaster or doing it
yourself get all the heavy pieces together in one place and blast
all at one time to save on expenses. However, be ready to treat each
piece of bare steel immediately after blasting or flash rust may
occur.
If you are going to powder coat the frame and there are no repairs that are needed, now would be the time but only after acid washing the frame to remove all oils, contaminants and blasting residue. If any repairs are necessary you would also have to address them at this time. One thing to keep in mind about powder coating and the one big difference between that and painting it, if there are any defects in the metal such as pitting or gouging, they will appear after the powder coating has been applied. You cannot do any bodywork such as using body filler when powder coating is done due to the high heat of the baking process. However, you can do welding repairs prior to the coating.

Before hiring a blaster or doing it
yourself, get all of the heavy pieces together in one place and
blast all at once to save on expenses and get a generally even
results. However, be ready to treat each piece of bare metal
immediately after blasting, or flash rust may occur.
If you are not concerned about seeing those types of defects then powder coating is a much cheaper and quicker way to apply paint to your frame and is suggested for a daily driver car. Keep in mind that a powder coating facility also needs to be relatively close to you to fully realize the savings.
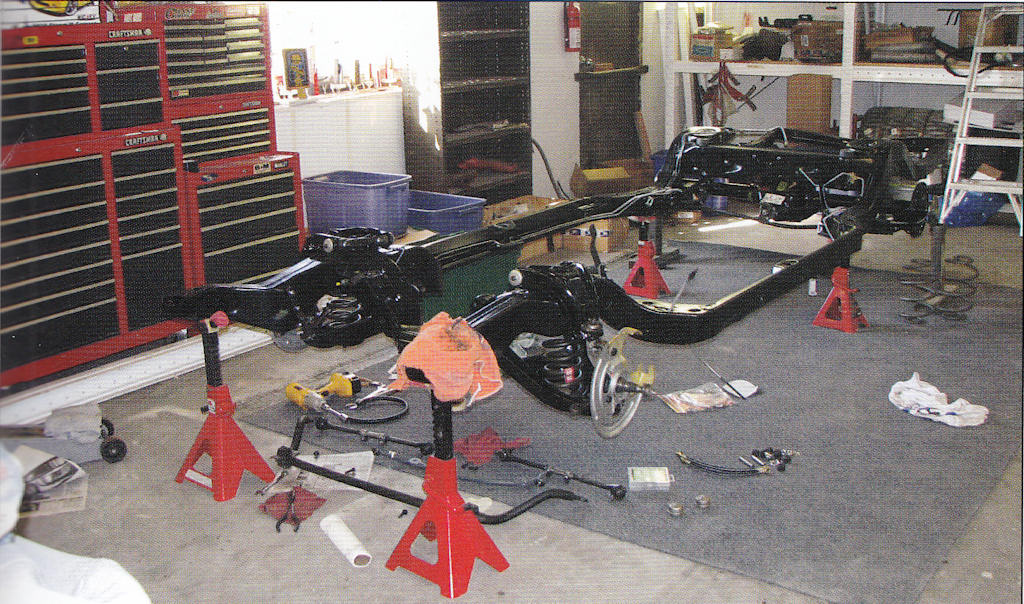
Doing your homework, taking your time,
and using quality products will give you the end result that will
make you feel great about the time and money you put into your
project.
Regardless of your paint removal and application method, you must treat the metal within hours of blasting or flash rusting will begin. You also need to be careful to not allow contaminants onto the bare metal as this can cause issues during the painting process. Even handling the bare metal with ungloved hands will allow contaminants in the metal. If you are able to keep the frame out of the elements or high humidity you can begin any needed repairs to the frame such as cracks, broken welds, bent rails or other areas, repairing mounting pads, etc. Once completed, the frame can be washed in an acid solution to remove all oils and other contaminants prior to priming it.
Carefully examine every square inch of the frame and look for bends, scrapes, pitting or rusted areas, thin portions of the frame due to rust, rusted body mounting pads or other issues. All should be addressed prior to moving forward and for safety reasons. It is rare that an almost 50 year old frame will not have been involved in at least a minor altercation somewhere in its life. Many issues can be straightened at a reputable frame shop but both you and they must know your limits. It can also get very costly depending on how severe the frame damage is so decide which would be best before you waste the money, fix or replace. There are several sites on the internet where you can obtain a copy of the frame measurements on your particular Chevelle. Many of the measurements are also available in the assembly manual. Check these and determine what steps need to be taken before getting started.
| Chapter 4 - Chassis, Suspension, and Brakes © Chevelle Restoration |


 |



