

Chassis, Suspension, and Brakes
Powdercoating
If you are going to powder coat the frame and there are no repairs that are needed, now would be the time but only after acid washing the frame to remove all oils, contaminants and blasting residue. If any repairs are necessary you would also have to address them at this time. One thing to keep in mind about powder coating and the one big difference between that and painting it, if there are any defects in the metal such as pitting or gouging, they will appear after the powder coating has been applied. You cannot do any bodywork such as using body filler when powder coating is done due to the high heat of the baking process. However, you can do welding repairs prior to the coating.
If you are not concerned about seeing those types of defects than powder coating is a much cheaper and quicker way to apply paint to your frame and is suggested for a daily driver car. Keep in mind that a powder coating facility also needs to be relatively close to you to fully realize the savings.
Regardless of your paint removal and application method, you must treat the metal within hours of blasting or flash rusting will begin. You also need to be careful to not allow contaminants onto the bare metal as this can cause issues during the painting process. Even handling the bare metal with ungloved hands will allow contaminants in the metal. If you are able to keep the frame out of the elements or high humidity you can begin any needed repairs to the frame such as cracks, broken welds, bent rails or other areas, repairing mounting pads, etc. Once completed, the frame can be washed in an acid solution to remove all oils and other contaminants prior to priming it.
Carefully examine every square inch of the frame and look for bends, scrapes, pitting or rusted areas, and thin portions of the frame due to rust, rusted body mounting pads or other issues. All should be addressed prior to moving forward and for safety reasons.
It is rare that an almost 50 year old frame will not have been involved in at least a minor altercation somewhere in its life. Many issues can be straightened at a reputable frame shop but both you and they must know your limits. It can also get very costly depending on how severe the frame damage is so decide which would be best before you waste the money, fix or replace. There are several sites on the internet where you can obtain a copy of the frame measurements on your particular Chevelle. Many of the measurements are also available in the assembly manual. Check these and determine what steps need to be taken before getting started.

This frame was badly damaged in a frontal
collision. The cost to straighten it is likely more than what a donor
frame would cost as these impacts can telegraph rearward and cause the
frame to get out of square. Let your frame shop be the judge on what
is salvageable.
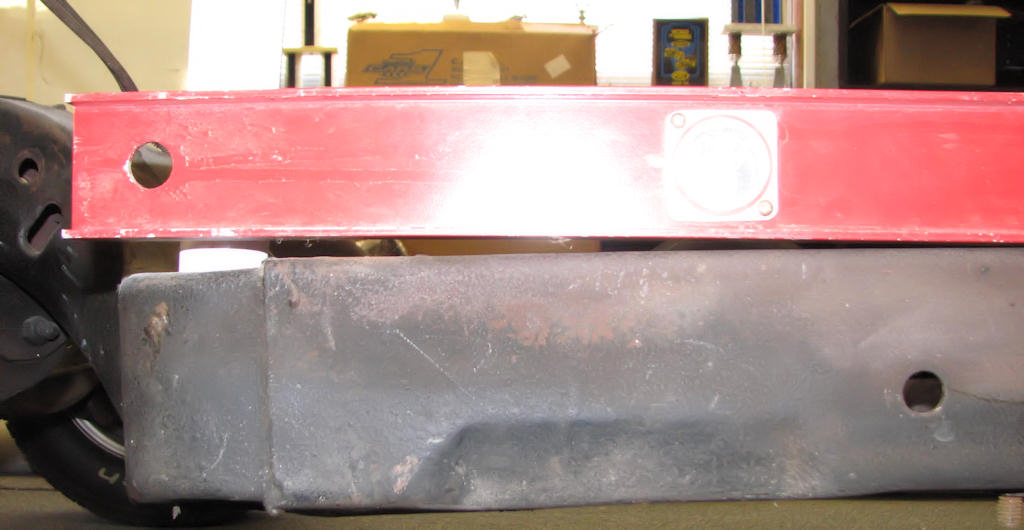
Using a straight edge it was very apparent
that there was an issue with this frame and this would have to be repaired
before moving forward. Not addressing this would cause great difficulty
in body and sheet metal fitment later on.
Check every weld joint for any signs of issues such as cracking or incomplete welds. Re-weld those areas at this time. Any cracks you find in the metal of the frame should also be v-grooved, welded and ground smooth. Look over the rest of the frame to insure that you have fixed any damaged areas that you have found, straightened the frame rails caused by poor placement of floor jacks or any other gouges, rips or tears.
It is also a good idea to roll the frame over on its back so you have a better view of the bottom side. Another area to pay attention to is the front crossmember. This is usually one of the first areas that makes contact with ground obstructions and it is very likely you will find severe damage here. This should be addressed if you want a good looking frame.
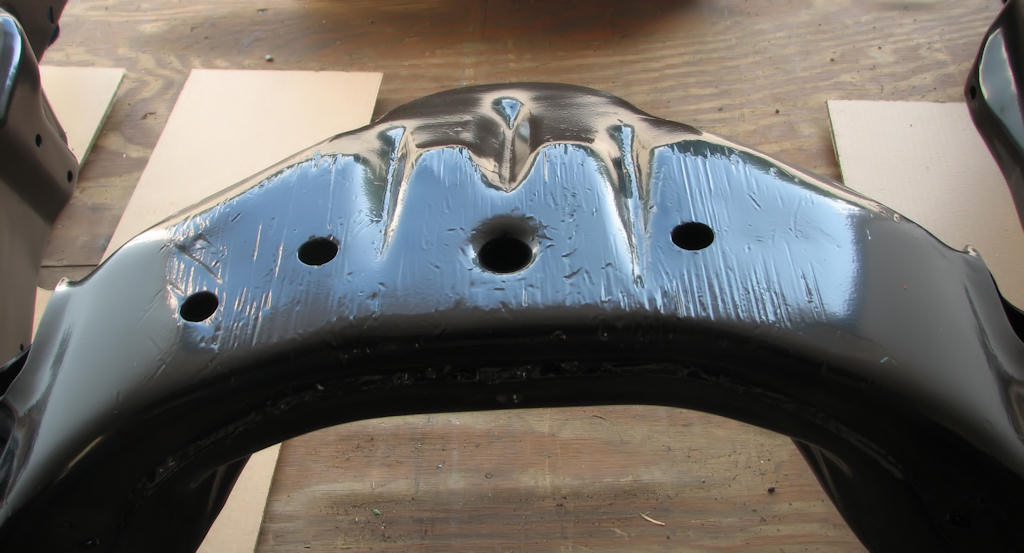
Not only is this part of the frame one
of the first places to contact obstructions, it is also one of the most
common areas of a frame needing attention. If you are powder coating
the frame you need to realize that this damage will not be hidden so
other means of repair or paint may be necessary.
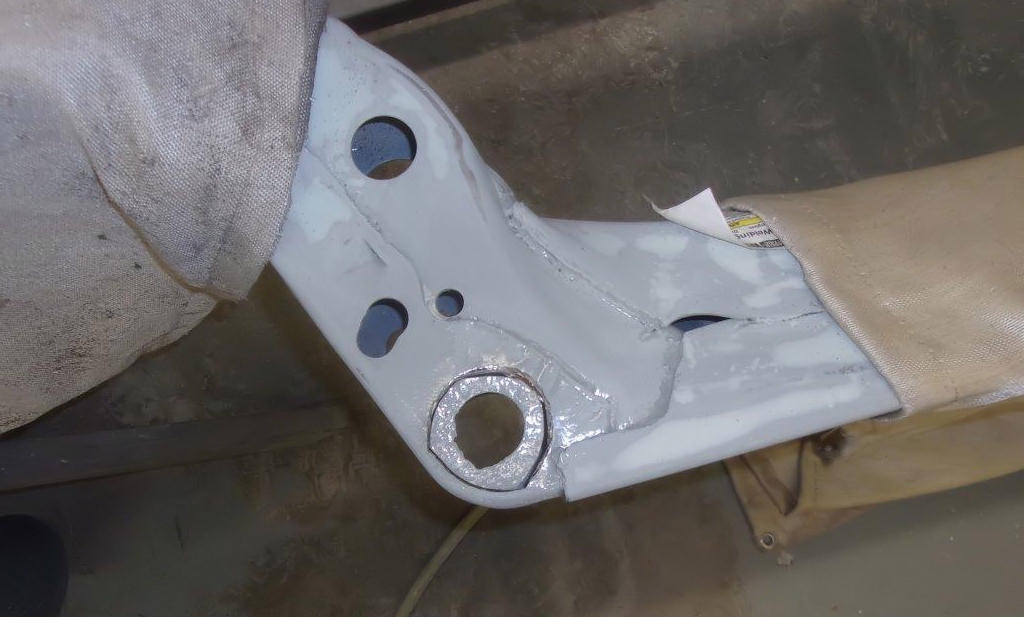
A very common sight on 50 year old frames
is rusted body mount holes. These must be repaired for proper body alignment
and safety. The area around this rust is too thin and cannot support
the body safely. Start by tracing around a replacement piece such as
a washer while making sure your placement is exactly centered over the
original. Cut out the area you have traced and weld in the replacement
steel followed by grinding.
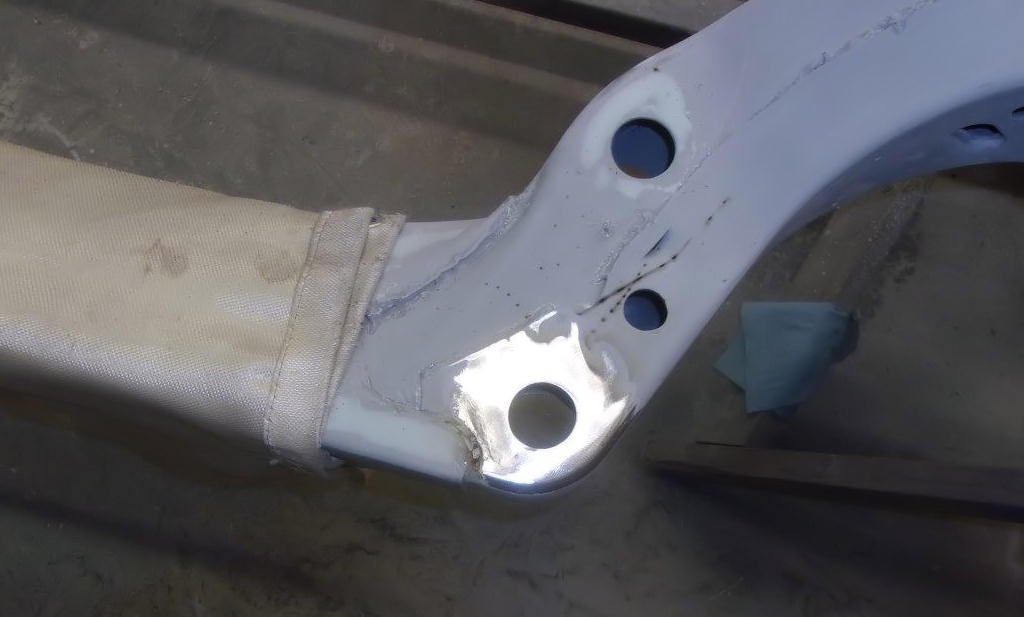
Post repairs show a perfectly strong and
usable hole to mount your body mount bushing. If done correctly no one
will ever know that there had been rust damage here before and the body
will stay where placed on the frame without the mounts pulling through.
Another common area of concern are the body mount holes in the frame. These are often corroded through or at the very least very thin. This area must be cut out, repaired and finished just like any other damaged part of the car or it may impede proper alignment of body panels later on. A simple way to fix this area is to use a large washer or a similar thickness piece of donor steel and trace a hole around it making sure you have your dead centers perfectly matched the best you can with the original hole or by using the frame measurements discussed earlier. You will also want to find or modify a washer with the same inside diameter as the outside diameter of the body mount where it fits down into the frame. Otherwise you will need to open that hole up to match the body mount extension. After tracing, cut out the damaged area in a circle and weld in the washer. Once completed grind and fill the welds and you now have a new strong body mount hole that will last for years.
| Chapter 4 - Chassis, Suspension, and Brakes © Chevelle Restoration |


 |



