

Chassis, Suspension, and Brakes
Suspension Rebuilding
For the most part, all suspension components of the Chevelle are fairly simple to remove, rebuild, or replace using common tools found in your toolbox. On some occasions, you may have to rent or purchase some tools to complete the task or hire a professional shop to complete the task. Rebuilding the suspension on these cars is not that difficult, and most home mechanics are perfectly capable of doing these repairs, thereby saving themselves a lot of money.
Upper Control Arm Shaft and Bushing Removal
The next step at this point is to remove the upper control arm shaft and bushings. Start by removing the bolt, lock washer and large bushing washer from the ends of the cross shafts. Normally it will require the use of a pneumatic chisel to pry the bushing out of the control arm and more often than not you can simply lay your chisel head under the flange of the busing and use it to ‘walk’ the bushing out. Be very careful not to damage the bushing mating surface or the cross shaft. In severely rusted conditions it may require a little more effort and strategy as sometimes the inner metal sleeve may have rusted itself to the cross shaft making it very difficult to remove the bushing.
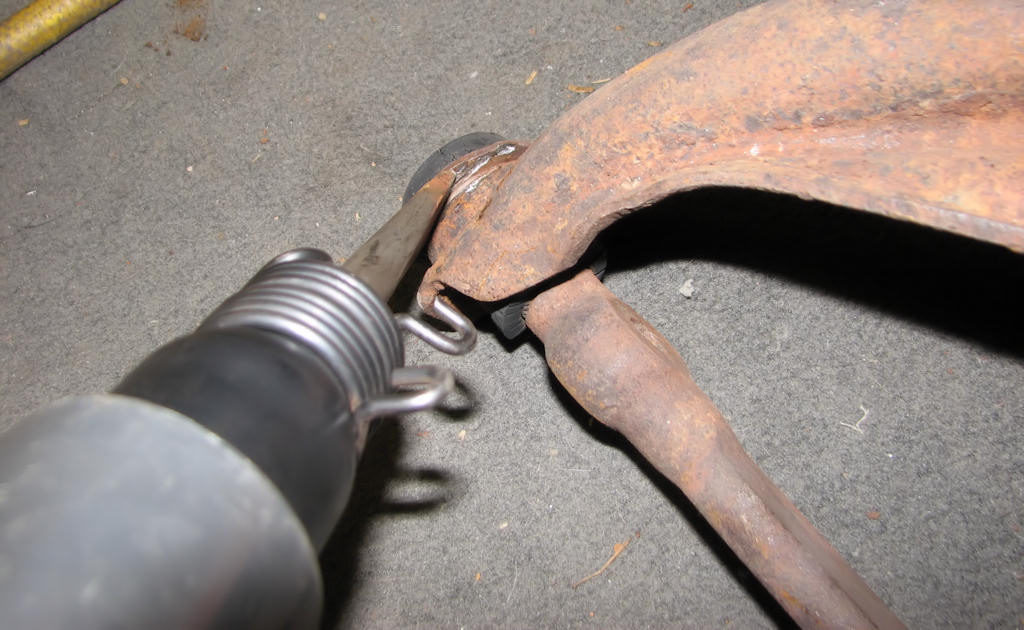
Remove the cross-shaft bushings using a pneumatic chisel. Simply
walk the tool around the flanged head of the bushing and walk it out.
It may first require compressing the bushing from the inside by putting
a V-groove on the backside of the bushing perpendicular to the flanged
area.
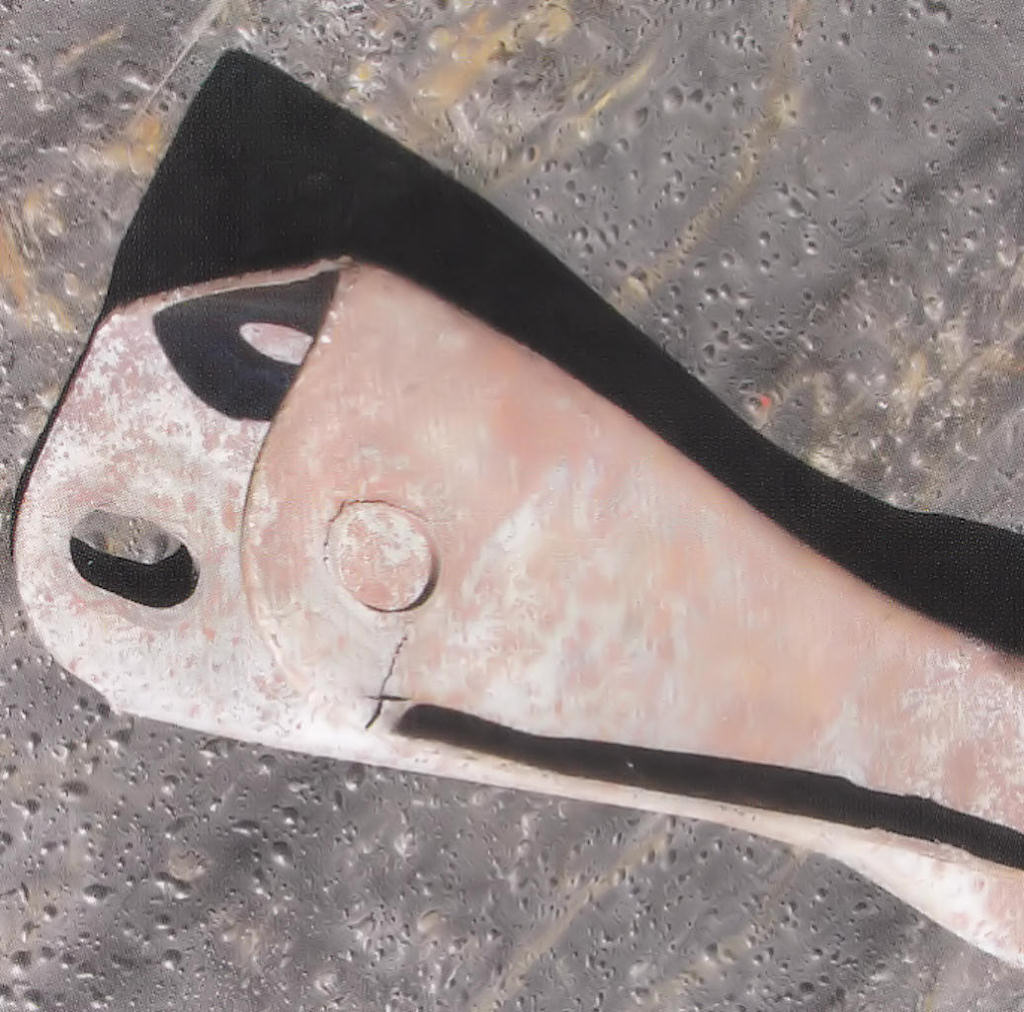
Always check your busing races and through-bolt holes for any signs
of damage, hole elongation, and/or cracks. If you rind any, these must
be repaired, or you can replace the control/trailing arm since not repairing
or replacing it will not allow the bushing to be seated correctly
or tight enough to hold it in place and the arm may move around on the
through bolt.
Original versus Aftermarket Offset Cross Shaft
After both bushings have been removed the shaft will simply come out of the control arm. As mentioned before, check the cross shafts for damaged threads, damage to the bushing shank or mounting holes. Also look to make sure it is not an offset shaft. The centerline of the entire shaft should be in line with the bushing sleeve mounting surface. If the shaft centerline is offset one way or the other with that surface than it was replaced and an offset was put in its place.

Compare the aftermarket offset cross shaft on the left with an original
on the right. Notice the offset from the centerline of the aftermarket
unit. Do not reuse these if you have completely replaced or repaired
your original suspension. Also note the method of bushed retention from
the original to the replacement.
Assuming all alignment issues, frame and suspension damage were addressed during the restoration, these offset cross shafts cannot be used as they will impede correct alignment settings. Lastly, make sure your bushing retainer washers were held onto the cross shaft by a fine threaded bolt and not a large lock nut (also used on aftermarket offset shafts). This method of mounting were used on some A body cars but not Chevelles to the best of my knowledge so make sure you use the fine threaded bolt version. They will interchange but are not considered correct.
| Chapter 4 - Chassis, Suspension, and Brakes © Chevelle Restoration |


 |



