

Chassis, Suspension, and Brakes
Rear Suspension Restoration
Rear Differential Restoration
If you had chosen to have your differential completely rebuilt or if you just simply freshened it up, you will want to restore the outside to match the condition of the rest of the frame restoration. It has been found that rear differential assemblies were delivered to GM in both a natural finish as well as painted a semi gloss paint depending on plant and other factors. When painted there was usually just enough paint to keep the differential from flash rusting while being rail transported. It has also been found both ways from the same plant so either could be considered correct.
Another known fact is that dealers often times painted some of the undercarriage of the car with a flash coat of black paint to hide any signs of flash rusting while the car sat on the dealer’s parking lot especially in arid climates. In these cases, usually only the rear portions of the differential was painted for visual reasons. Detective work and research needs to be performed on your particular Chevelle to determine how your car was originally assembled if you chose to restore it that way. If you intend to use your Chevelle as a daily driver it would be better to paint the entire differential overall black to protect it
We will discuss both methods here and let you decide. On original cars that were painted all black, this would include the completely assembled rear differential and brakes with backing plates and drums installed. Brake lines have also been found to have been painted on some as well.
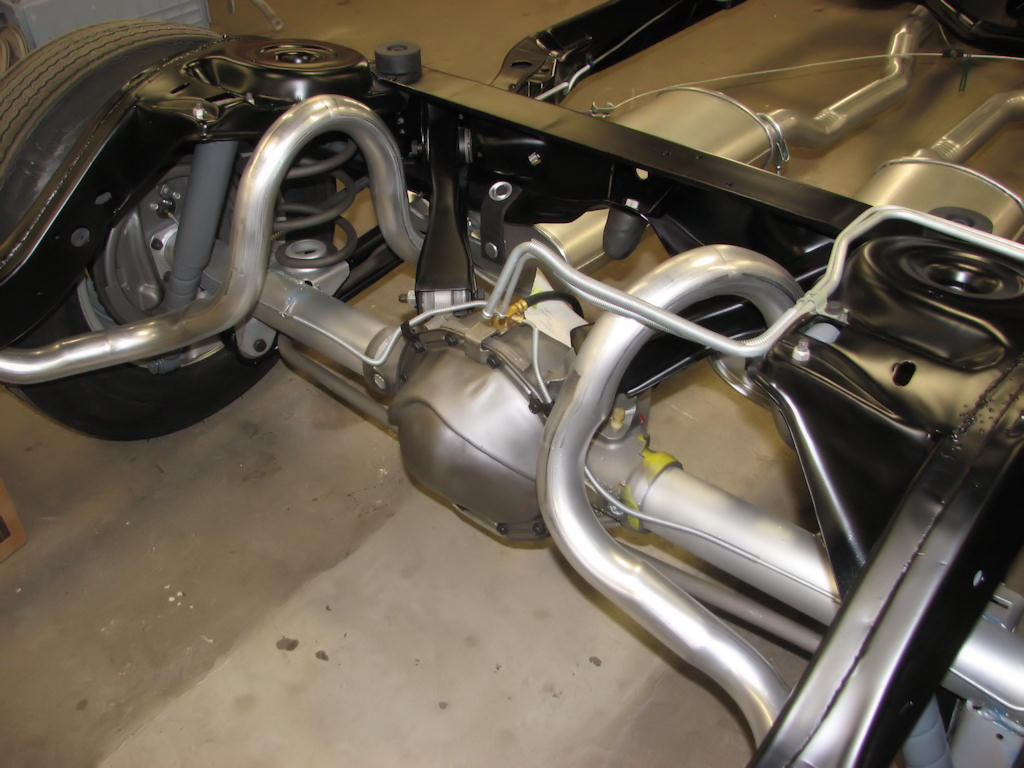
When restoring your differential in a natural finish,
you can achieve the appearance of the various type of steel and cast-iron
items using various colors of paint. You may also want to add inspection
marks that were used during the assembly and pre-machining stages of
the assembly.
Starting with a completely restored or freshened up differential, attach the sub assemblies onto the rear assembly such as the brake backing plates, rear brake hardware and finally the axels and brake drums. The rear backing plates are very similar but you must install each backing plate so that the emergency brake cable hole is mounted towards the front of the vehicle. Because the brake drums were originally installed during the paint process and this included the brake hardware you will want to restore this area prior to painting the complete differential assembly.
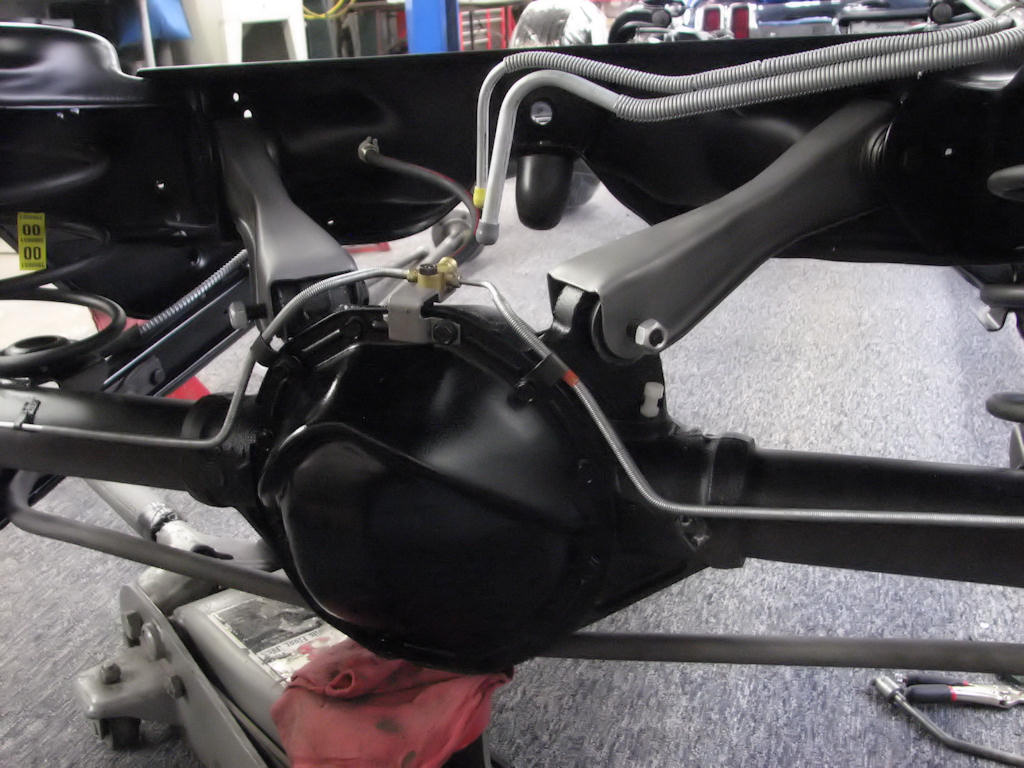
If choosing to restore your differential in the more common black
finish, you can add inspection marks prior to the paint process and
put a light coat of black over the entire differential as was done originally
which will also allow the inspection mar5ks to bleed through and be
slightly seen.
The inside portion of the backing plate would have been bare steel when original. To ward off future rusting and to make this area looks correct it is suggested to paint the inside of the backing plate with a stainless steel or bare steel colored paint. Once cured you can add the brake hardware onto the backing plate. If you are rebuilding the rear differential is would be suggested to paint the inside of the backing plate prior to installing the axle shafts to obtain a more complete coverage with nothing in your way as you paint them.
Your backing plates are now ready for assembly. Install your brake hardware starting with the rebuilt or replacement wheel cylinders. On a car that will be used as a weekend car it is much cheaper and easier to replace the wheel cylinders with a pair from your auto parts store. If this will be a concours restoration you can often times rebuild your own original Delco Moraine cylinders by simply disassembling, bead blasting them and then hone them smooth using a brake cylinder hone available from most auto parts or tool suppliers. You can also buy wheel cylinder rebuild kits to replace the spring, pistons and seals found within the cylinder.
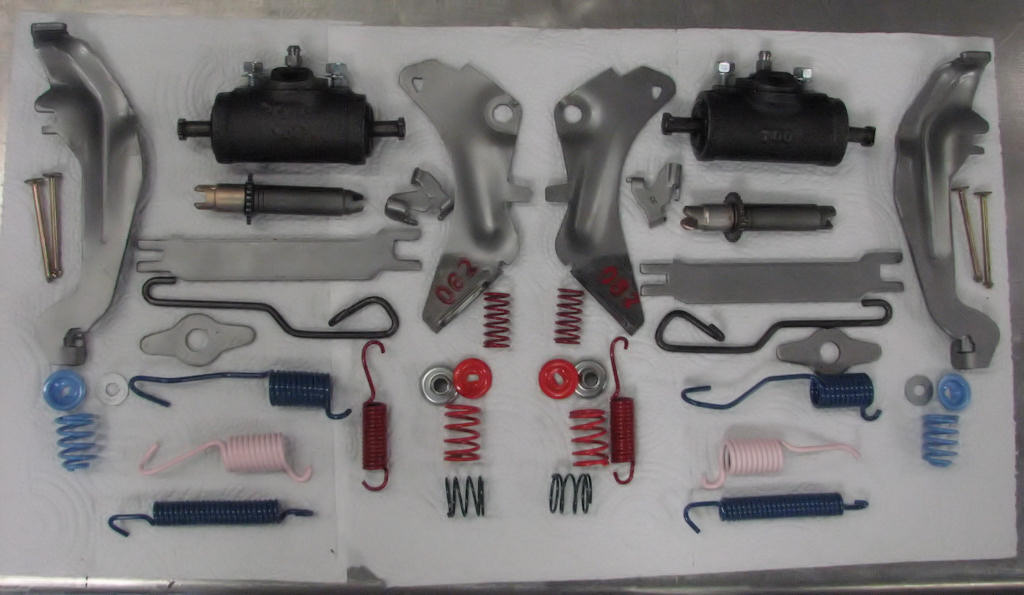
Before installing the rear brake hardware, lay all
of it out on a towel with the left and right side separated. This will
give you a visual on what needs to be installed. Do one side at a time.
There are brake rebuild kits with new springs and retainers.
If you find the bores on your originals to be too badly pitted where the hone will not remove the pitting, it will require that you replace them or send them off to a reputable service company and have them re-sleeved. This will give you a brand new bore surface which you can then reassemble using a rebuild kit. This can be very expensive and time consuming so plan ahead for these.
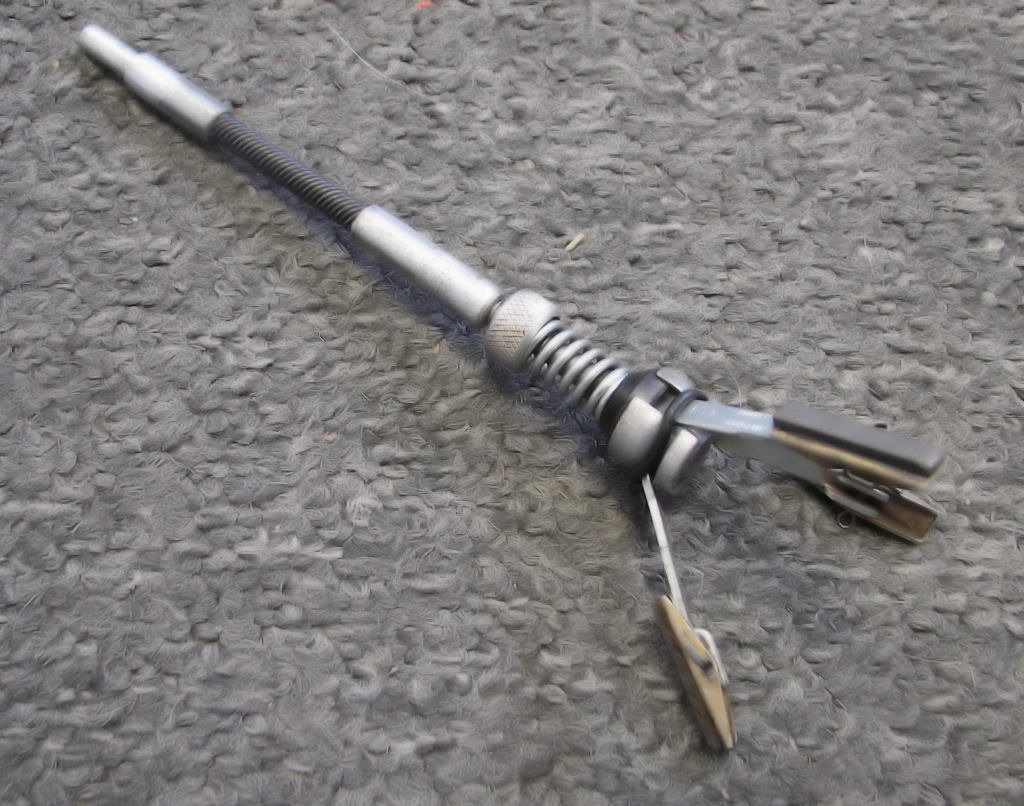
Available from most tool suppliers or automotive
parts suppliers is a brake hone made for honing out the wheel cylinders.
Make sure to purchase the correct size for your wheel cylinders and
hone to a nice smooth finish.
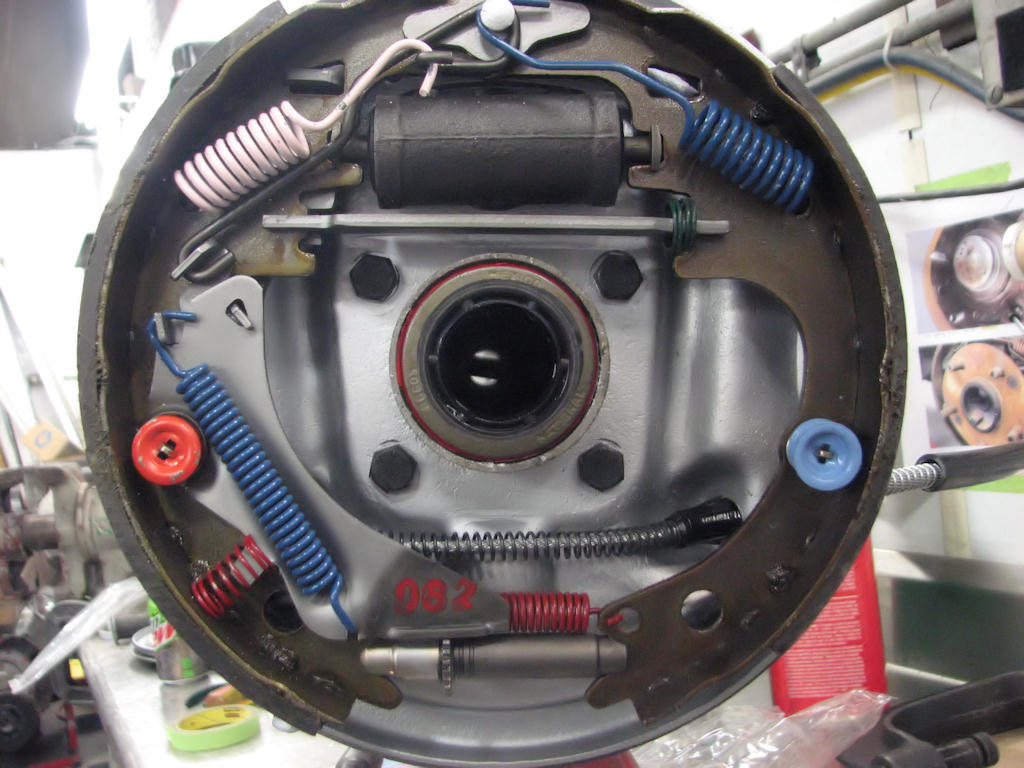
The axle has been removed to show how the hardware
is installed. Use this as a guide (or refer the photos you took before
disassembly), as a guide for the color and installation of the springs,
shoes, levers, and adjusters. Notice these shoes are the original-style
bonded type and not the current riveted type.
Restore all your brake hardware for a concours restoration or replace with a complete hardware kit from your auto parts supplier. If you chose to restore, it is easiest to put them in paint stripper or bead blast all the component parts and then finish them off in the appropriate color. Make sure to keep the right and left hand parts separated during the restoration process as many of these are handed and must be reinstalled on the correct side. Before you bead blast or strip your parts document what color and shade of color they were. There can be some variation to the color and shade of these parts depending on which parts supplier GM used, which plant and the year so refer to the notes you took during the disassembly process. Once you have cleaned and washed all the parts, hang them for painting. After they have dried you can lay them out on a towel or piece of cardboard for ease of installation again keeping the two sides separated.
From this point assemble the left and right side brake hardware on their appropriate sides of the rear axle. Have your new brake shoes handy as well before you start. The first item to take care of is to lubricate the six brake shoe contacting pads on the backing plate with lithium grease. As stated earlier in the chapter if these have a deep groove in them the backing plate pads either need to be welded and ground smooth or the backing plates replaced otherwise the shoes will not move in and out as designed.
Make sure to always install the primary shoe (the shoe with the shorter brake pad of the two) towards the front of the car or the brakes will not apply correctly. Assemble all the hardware and shoes per the assembly manual and check for free movement. You will also need to install your rear emergency brake cables at this time. The cable should be inserted through the hole near the front lower edge of the backing plate. It will be installed completely when you hear the locking tabs “click” as they are inserted. Now attach the tail end of the cable to the emergency brake application lever behind the secondary shoe.
Pay close attention to the bottom shoe to shoe holding spring. If not installed correctly it will inhibit the star wheel adjuster from working correctly and adjusting the brakes.
| Chapter 4 - Chassis, Suspension, and Brakes © Chevelle Restoration |


 |



