

Chassis, Suspension, and Brakes
Rear Brake Drum Restoration
As for the rear brake drum, you will want to sand blast or aluminum oxide media blast these to remove any rust after first insuring that they have adequate thickness left on the drum to be able to be turned. Once they are blasted you can paint them overall cast iron color. If not done already this would be a good time to turn them. If they are turned before painting them you will need to give them a very good bath to remove any oil film that might get on them during the handling and turning process.
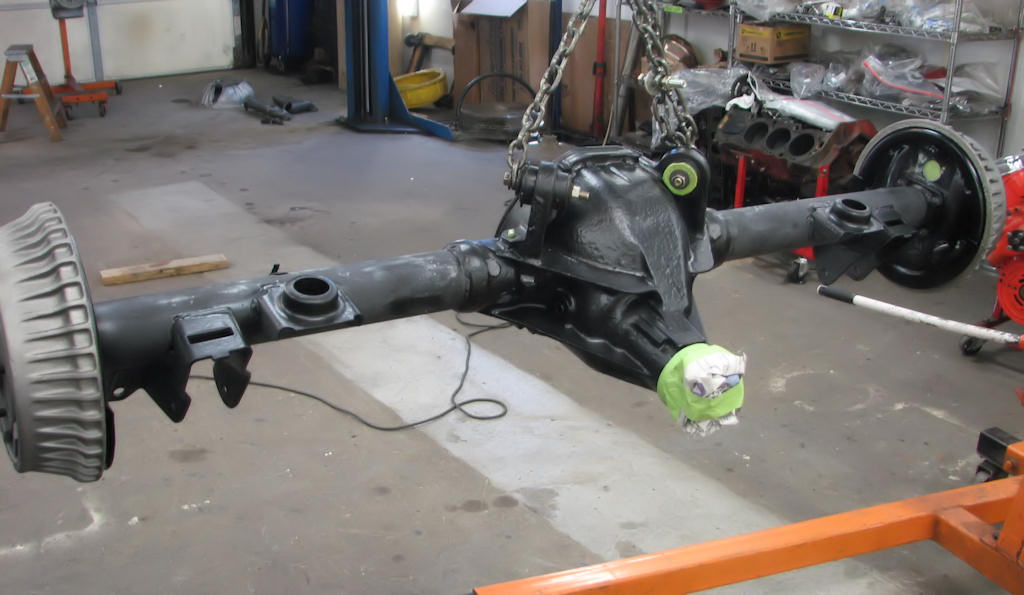
For ease of bodywork and paint, it is best to hang the differential
assembly from a hoist or engine cherry picker to gain full access to
all areas of the differential. Always wash down your components with
a metal prep prior to painting for good primer and paint adhesion.
Perform any needed body work such as filling pits in the axle tube area or backing plates. The differential center housing was cast iron and will have many pot marks from the casting process. Those as a general rule do not need to be filled unless you chose to do it for a smoother look or if it really badly pitted.
Painting the Rear Differential
Once sanded and all body work completed, it is time to paint the assembly. One of the simplest ways to paint your differential is to hang it from something like an engine cherry picker using a chain or other sufficient means from the upper trailing arm mounts so that it is unobstructed when painting. Once hung, wash down the entire assembly using Prep Sol and do not handle any of it with bare hands, then prepare it for painting. Mask off any areas that you do not want to get paint on such as the trailing arm bushings, the previously installed emergency brake cable, pinion flange and the oil slinger on the front of the differential.
The complete painting techniques are covered in the paint and body section so we will only skim over what is necessary here. After you are done doing your body filling, sanding and cleaning it is time to apply some primer in order to protect the metal and give the paint a good base. Cleanliness is paramount so make sure you have everything once again wiped down with metal prep and a tack cloth before priming.
Whether you are using a spray can or a spray gun to apply your paint, make sure that the paint is mixed thoroughly, you have adequate ventilation and that the temperature of the area you are painting in is suitable for paint application. Cover your entire differential with a light coat of primer, let it tack up a bit and then follow it with a couple of good coats to completely seal it. After the primer has cured per the manufacturer’s directions, wet sand the entire area to give the surface a texture to receive the paint coat. Completely blow off the dust as well as any water that may have gotten trapped during the wet sand process followed by a thorough wipe down with the tack cloth just prior to color painting.
Cast-Iron Look
If you intend to finish your differential in a natural, as built finish understand that the steel axle tubes and backing plates will be a different color than the cast iron center section. Regardless of which paint application method you are using to paint the differential, it is suggested to use a stainless steel or natural steel colored paint for the axle tubes and backing plates and a cast iron color for the center section. Mask off the axle tubes and if the rear cover is installed, mask that off as well.
The rear cover on the natural colored differentials is usually found to be bare steel with black phosphate bolts. It is best to use paint stripper on the cover instead of media blasting to retain the natural steel look. If it is badly pitted you will need to perform the necessary body work followed be a steel colored paint. If leaving natural steel then treat with a clear paint or a brush/spray on protector like T9 Boe-Shield. Use this method only when leaving natural as you will not be able to top coat the cover with any type of paint due to the waxy finish that Boe-Shield leaves.
Also and again assuming since you are painting your differential in a natural finish, it is because you are looking for an authentic as built appearance. Therefore it is also assumed that you may want to apply your inspection paint marks after the paint has dried to replicate an as delivered differential to Chevrolet. If you intend to paint your differential black then apply these colored inspection marks before you spray the black and cover it lightly allowing some of the inspection marks to bleed through.
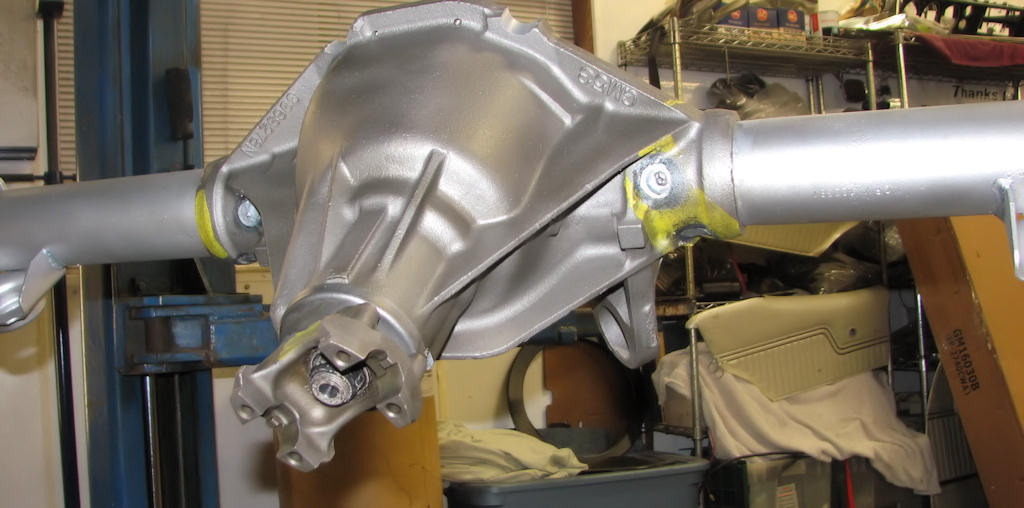
If you choose to restore your differential in its natural finish,
be sure to add the manufacturing plant inspection marks to the rear
after you have simulated its natural appearance. If you choose to paint
the differential black, many of these inspection marks should be slightly
covered in paint.
Differential Inspection Marks
There are several inspection marks that have been found on rear differentials. This author has mainly seen yellow and blue marks which are usually painted on the differential in similar manners. However, these were for the most part documented on 454 cars so other rear differentials may vary depending on 10 or 12 bolt and 396 or 454 equipped cars so use this only as a guide. The yellow marks have been found on the bottoms and tops of the center housing as well as the plug weld areas where the axle tubes were welded into the center housing. After welding, portions of the yellow paint burned off and left a bluing appearance around the weld from the intense heat. With a little experimenting and experience this can easily be replicated.
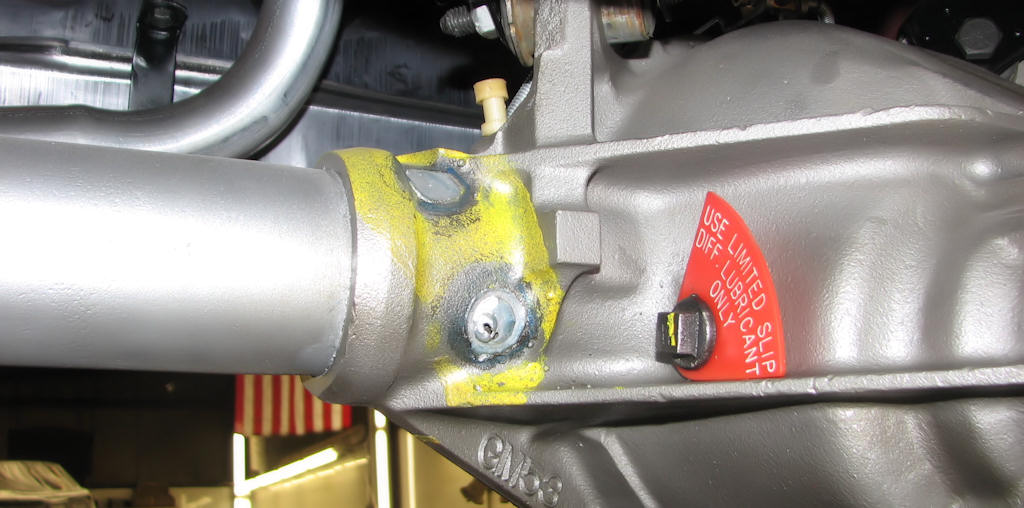
Prior to completed machining, the differential assembly plant applied
paint marks to various parts of the assembly to denote where things
were to be welded and for other reasons yet understood. In the case
of these yellow markings, they were applied to the center housing prior
to the axle tubes being welded into the housing. Once welding was done,
it burned off much of the yellow paint and left bluing where the welded
area heated up.
Other markings have been found on or near the axle tube areas as well. Careful cleaning during the disassembly process may possibly expose these marking so that they can be replicated during the restoration. Many inspection markings that have been found on these cars have no rhyme or reason to their colors, layout or consistency so it is often times best to replicate only what you find and exactly how you found it.
If you chose to restore your differential in the natural finish and then give it a slight black out that is another option. Many times dealers would dress up their cars after they received them and during the clean up process after the cars arrived at their dealerships. Many did not want customers to see flash rusting on parts of the suspension and undercarriage so they would spot paint black out paint in those areas to make the car more appealing. Great care was not taken during this process so you will see black overspray on surrounding areas of the car other than where it was intended as well as drips since the applicator was not too worried about how perfect it was as long as it hid the rust. Many restorers want to replicate this look.
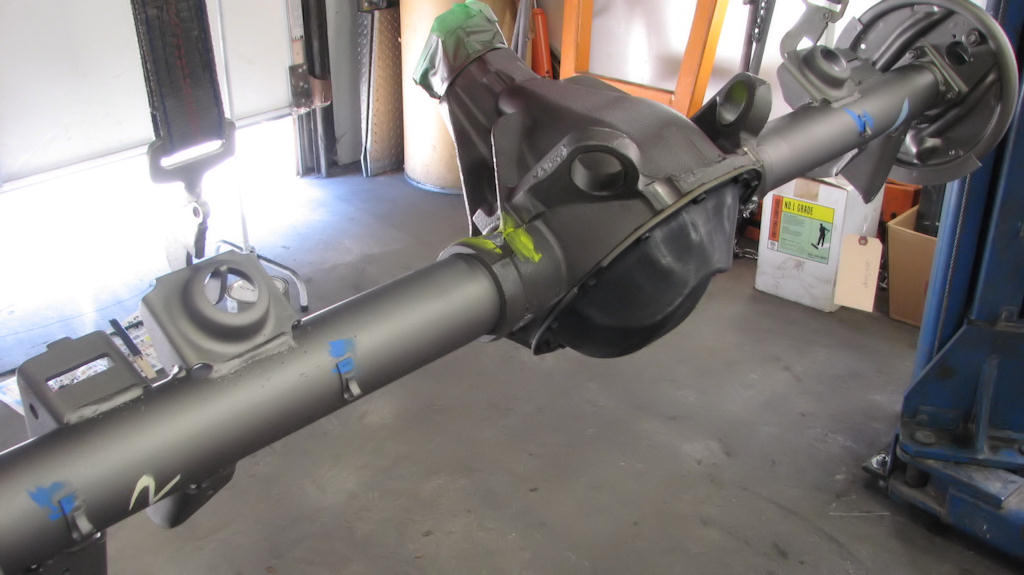
For reasons unknown, other inspection marks can be found on other
parts of the rear differential and axle tubes. These may be to signify
that the welds on the brake line retainer clips were intact, while others
may be done to signify that the assembly was inspected and cleared for
the next step in the assembly process.
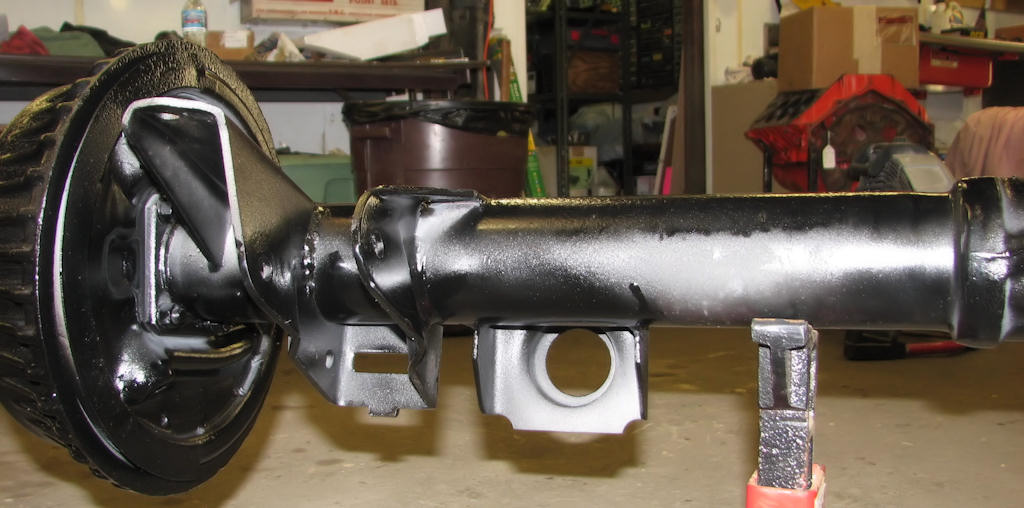
Sometimes dealers chose to apply some black-out paint to parts of
the suspension so potential customers did not have to look at flash
rust that developed while cars sat in the elements on the dealer's lots.
These black-out coats were haphazardly applied, so poor coverage and
drips were common. Brake lines were also often painted over in the process.
The last option is to paint your differential in complete semi-gloss black paint coverage. This is strongly recommended on a Chevelle that will be driven frequently. All the same preparation steps need to be taken as outlined previously. For a more appealing appearance you can leave the brake lines off until the differential has been painted. It is best to install the brake drums and put an overspray coat of black around the finned area as most of the time the entire drum did not get fuller covered in black paint. However, there is no right or wrong way as far as how much paint and how large or small an area of coverage as these were painted by humans and may vary. Perfection was not a prerequisite

The most common way that rear differentials are restored is in an
overall semi-gloss black finish. How much coverage is applied is up
to the restorer, whether they are just looking to replicate how the
assembly plant painted it or if they intend to drive the car frequently
and just want it to look good.
The upper and lower trailing arms were ‘usually’ finished in the same manner as the rear differential though they can still vary so again, research is your best friend here. It is fairly common to find Baltimore, Atlanta and Arlington Chevelles with all natural differentials and trailing arms though some have been found with either or both of the differential and/or trailing arms painted black as well. Finish these using the same techniques as you did painting the rear differential. Chevelles have also been found to have natural upper arms while the lowers were painted. There just does not seem to be any rhyme or reason to how they were done, not the assembly plant or assembly date.
| Chapter 4 - Chassis, Suspension, and Brakes © Chevelle Restoration |


 |



