

Chassis, Suspension, and Brakes
Chassis Reassembly

Now that you have all of your components painted it is time to assemble the entire frame and all the suspension components. Clean your work area up completely so that you have nothing there that does not belong there. If possible, put a roll of cheap indoor short knap carpet down on the floor that is at least as large as the frame is long and a little wider than the width of the frame. This will allow you to place your freshly restored parts out in the general area that they will be restored and set on something soft so they will not get scratched or otherwise damaged.
Set your frame on floor jacks in an area that will not be in your way as you try and reassembly the frame and allow enough height to swing the lower control arms down during the assembly process. You will also need to allow room for the placement of a floor jack underneath the control arm. The longest part of the side frame rails is the best place and at the corners. Lay all your front suspension components near the front of the frame and your rear components near the rear. This will include all the mounting hardware, nuts, clips, lines, etc. This is where your previously tagged and bagged hardware will become much easier to install since it will be organized.
Fuel Lines
Start by inserting your single or dual fuel lines into the frame first inserting them one at a time in the oval hole located in the inboard front passenger frame rail midway through the bend. After inserting them one at a time you will need to use your hand and guide the front of the lines into the frame rail and then out the hole on the front side of the engine crossmember where it meets the frame rail. It is very helpful to have a helper guide the rear of the fuel lines and help feed them as well as keeping them from scratching the frame.
Once fully inserted install the restored fuel line clips back into their original locations and securely fasten with the same bolts that you removed. You may need to reposition the wrapped spring to allow the clamps to be installed where they are supposed to be and fit that part of the line.
Brake Lines
Move onto the brake lines and install the distribution valve onto the frame rail near the front. Attach the long brake line that runs along the driver’s side frame rail again using the same clamps you previously removed. Thread the line into the distribution valve but do not tighten at this time.
Just as on the fuel lines you may have to reposition the coil springs wrapped on the line to allow the clamps to fit in their locations. If your car is equipped with disc brakes, mount the hold off valve to the rear crossmember and loosely attach the brake line to it. Attach the short V-shaped brake line to the hold off valve and to where it will eventually be attached to the rear flex brake line on the other end.
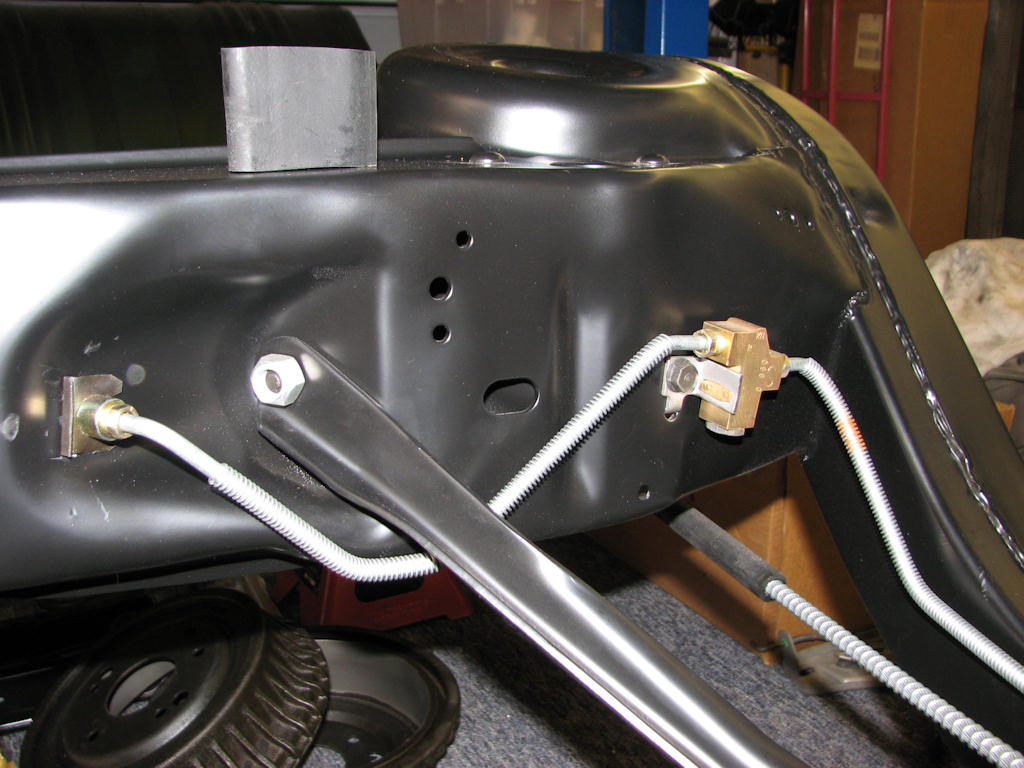
The disc brake hold-off valve allows the rear brakes to be
applied before the front brakes to ward off a frontal dive that
would happen during normal brake application without it. Loosely
attach the lines to this valve during the initial assembly process.
Moving to the front of the car loosely attach the cross over brake line and clips across the rear portion of the engine crossmember and to the distribution valve with their associated brake line clips. In the disassembly process you removed an “L” bracket from either side of the frame where the hard brake lines met the flex lines. Install those back onto the left and right sides of the frame at this time.
On the driver’s side you will have a short brake line that runs from the distribution valve to the “L” bracket that is mounted on the same side. Loosely attach this line. Attach the flex lines on both sides of the frame where the “L” brackets are. Loosely attach them to the hard line and then insert the flat U shaped clamp on both sides to lock the lines to the “L” bracket. With fuel and brake lines partially attached we can now move onto the suspension.
Engine Frame Stands
Before attaching the front control arms it is time to replace the frame-mounted engine stands as they can easily be accessed without the control arms in the way. Refer to your photo documentation when you disassembled the frame and attach the brackets back to the frame on the same sides as they came off of and with the mounting bolts orientated as you found them. Even part numbers or items labeled with an “R” always go on the passenger side.

Note which way the frame stand bolts are facing. This will vary
by plant and assembly date. Even-part-numbered items or those labeled
with an "R" will always go on the passenger side. Note how the batter
cable bracket is mounted here as well.
Do not forget to add the battery cable bracket during this installation process. It will be mounted on the front outside bolt of the passenger side motor mount and with the battery cable loop hanging down.
Control Arm Bumpers
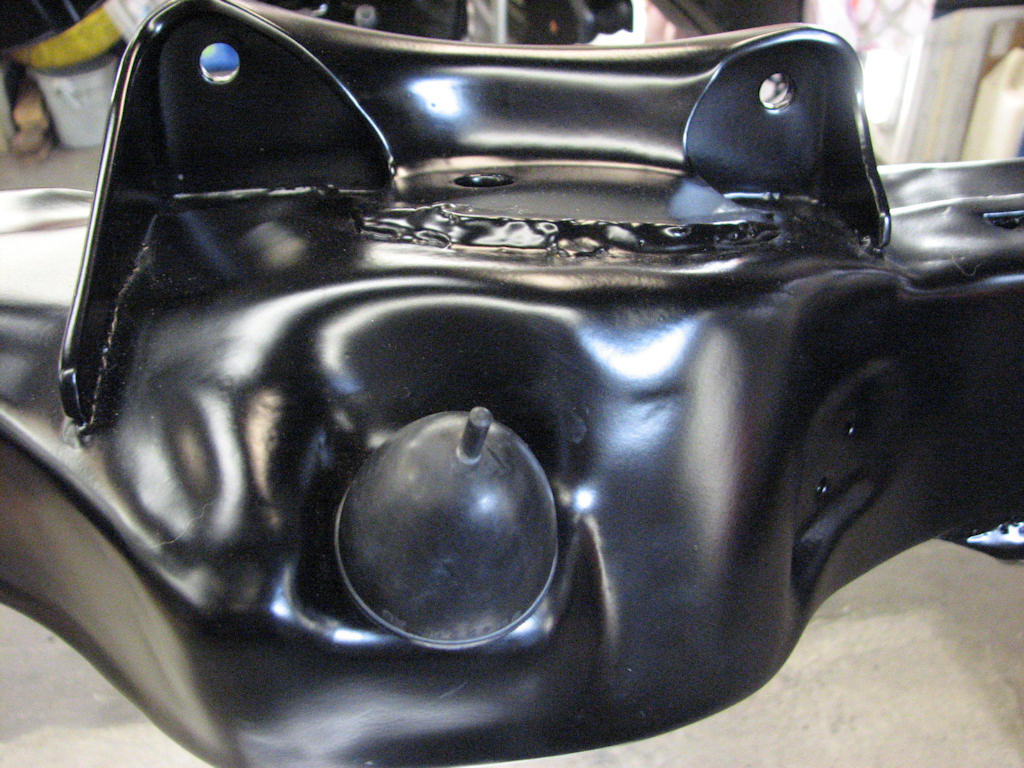
Before installing the upper control arms, it is vitally
important to remember to install this small upper bumper. Not doing
so now will make for a complete headache later with it will be
nearly impossible to install.
Before installing the upper control arms it is imperative that you remember to install the control arm bumper onto the frame at the point where the upper control arm contacts the frame when at full lift. Once the front suspension is fully installed it will be very difficult at best to install it. Place some white lithium grease on the nipple of the bumper and using a twisting motion install it into the hole at the top of the frame.
| Chapter 4 - Chassis, Suspension, and Brakes © Chevelle Restoration |


 |



