

Chassis, Suspension, and Brakes
Chassis Reassembly - continued
Upper Control Arms
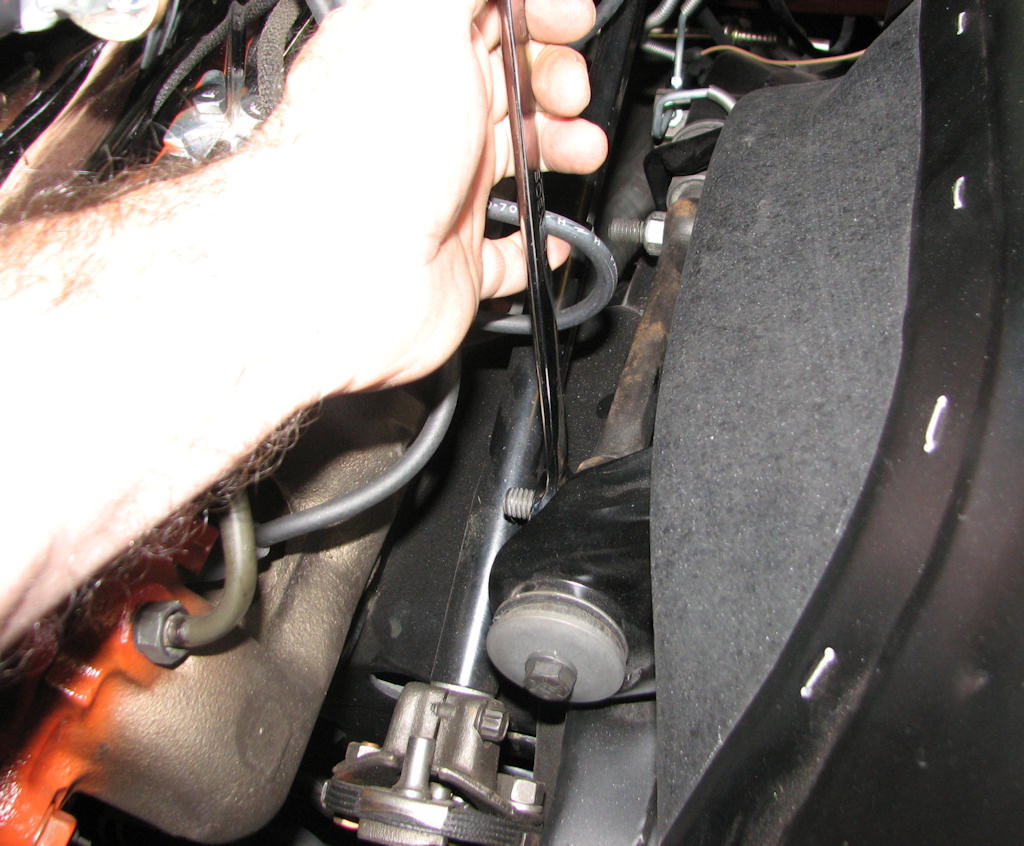
Install the upper control arms onto their studs and only
slightly tighten the lock nuts at this time. Note the bushing
compression washers, lock nuts, and bolts are installed into the
cross shafts. Only slightly tighten them at this time.
Insert the fully restored upper control arms back onto the frame mounts making sure you install the correct one on the correct side. Sometimes slight alignment help will be needed to get the cross shaft to start on the bolts. Ever so gently tap the bolts in the direct needed to align them with the holes on the cross shaft using a rubber mallet. Lightly tap the cross shaft all the way onto the bolts and thread on the new stop nuts (and lock washers) if yours originally had them. For now just gently snug them up.
Install new bushing compression washers, lock washers and bolts back onto your cross shaft and again only snug them up at this time. Do the same for the other side.
Bump Stops and Lower Control Arms
Moving onto the lower control arms, install new bump stops onto each control arm and then install the control arm into the lower mounts. Again make sure you install the correct arm on the correct side. An easy way to remember is the hole for the bump stop will be on the front side of the control arm. Installing the arms can sometimes be somewhat difficult if the mounting flanges are bent or compressed in any way. Putting a little white lithium grease on the ends of the bushings will also aid in installing them. It helps to have an extra set of hands here so if you have anyone available, ask them to help for a bit.
Start by wiggling the control arm into place. Use of a large rubber mallet may also help in the installation. Once the bushings get close you can often times insert a small pin punch or driver through the bolt hole to help align them as well as keeping them in place. Once both bushing holes are lined up in the frame mounts insert new bolts through the holes facing them towards the rear of the car in both the front and rear holes. Slight tapping of the bolts may be required. Finish by threading on new stop nuts onto the bolts but again only snug them up.
Repeat for the other side. After they are both installed, put your spindles onto the lower ball joint stud and thread the castle nut all the way on but do not tighten yet.
Coil Spring Reinstallation
The interesting part comes now with the installation of the coil springs. Use the same method you used when you removed them but in reverse. Again, an extra set of hands will come in very handy and make it much safer. Make sure the upper part of the coil spring which is the flat side, is fully seated around the spring flange up inside the frame rail. Also check the bottom coil of the spring and make sure that the coil end will seat into the pocket formed into the lower control arm. Not seating it on either the top or bottom correctly will cause severe issues later so take your time and do it right. Once you have the coil spring in place start to compress it using your spring compressor.
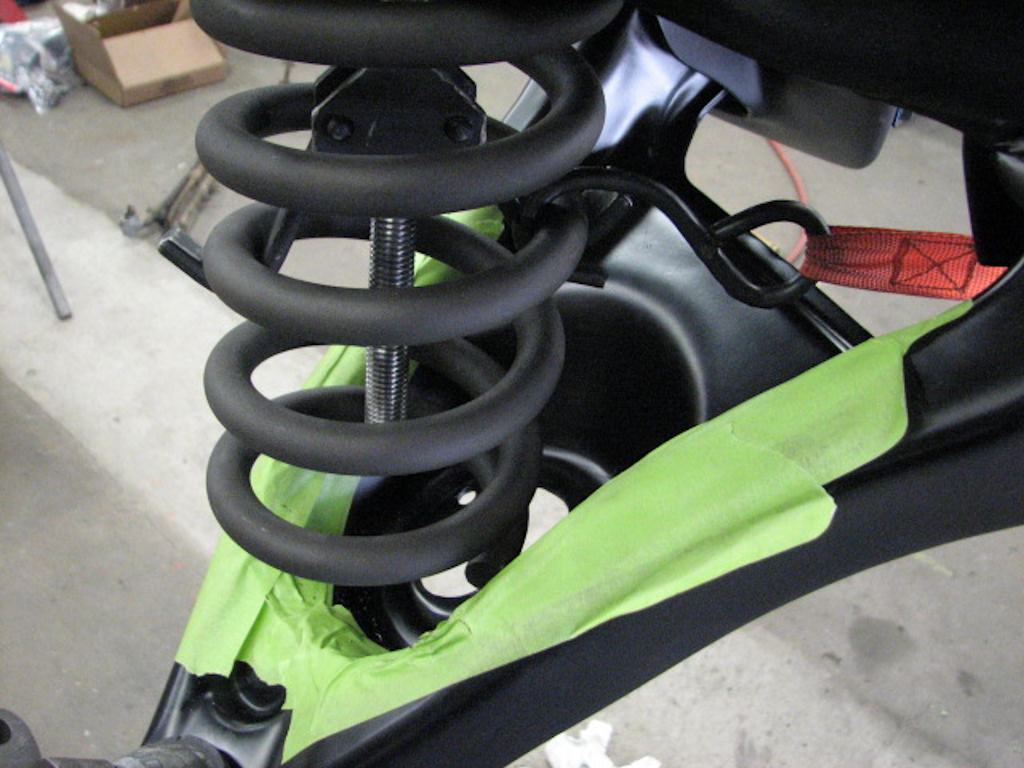
After applying some compression to the spring I like to attach a ratchet strap that is of adequate strength about 2-3 coils from the bottom and diagonally across to the opposite side frame rail and slightly rearward. This will help you keep the spring in alignment with the lower control arm spring perch to aid in assembly. A good idea is to apply a liberal amount of wide masking tape around the perch area to help protect from any scratches during assembly that the coil spring may cause. However, you want to be sure you have it high enough on the perch that the tape can be removed around the soon to be seated coil spring. As you compress the coil spring, ratchet the strap as needed to pull the spring inward and backward enough to seat. As always, be sure and wear hand and eye protection.
Proceed to compress the coil spring just enough to be able to raise the lower control arm and spindle up to get the spindle attached to the upper control arm upper ball joint stud. Once you insert the stud through the spindle, attach the upper castle nut and use this to pull the control arm the rest of the way while the spring compressor stays in place for safety reasons. Before removing the spring compressor make double sure that the upper coil is seated around the upper flange correctly and the lower coil end is sitting within its pocket on the lower control arm. If not, your car will never sit level. Once you have verified all is correct then carefully remove the ratchet strap and spring compressor and repeat all the steps for the other side. Once completed, the hard and potentially dangerous part is now behind you.
| Chapter 4 - Chassis, Suspension, and Brakes © Chevelle Restoration |


 |



