Chassis, Suspension, and Brakes
Chassis Reassembly - continued
Miscellaneous Spindle Attachments
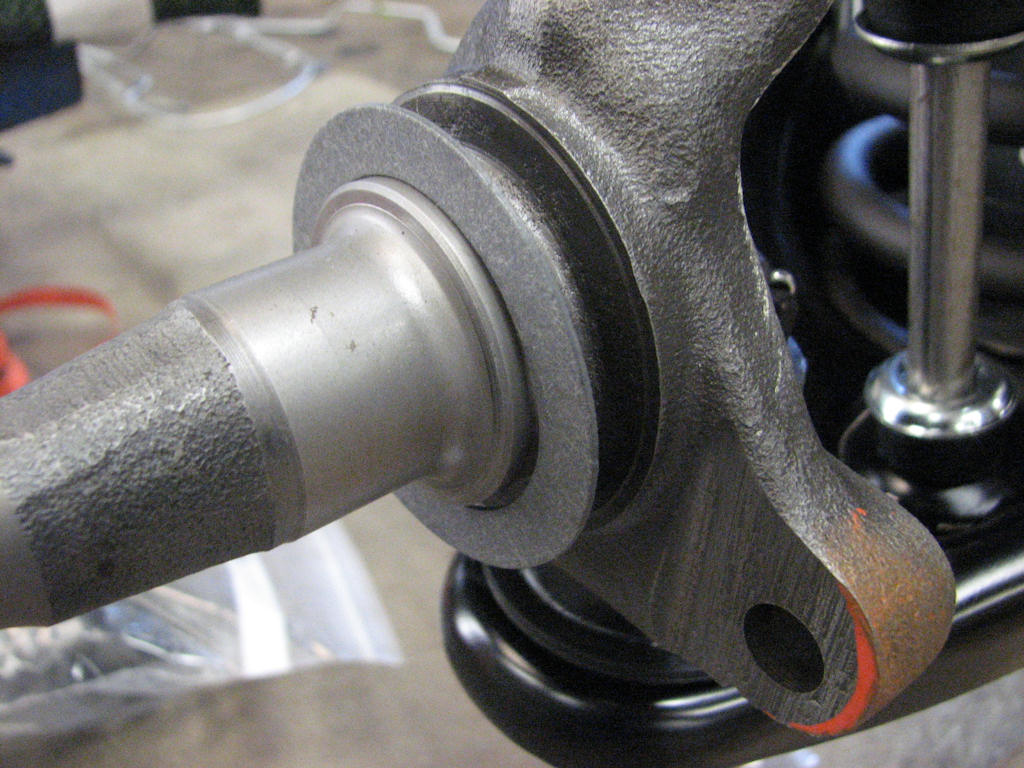
Once the control arms and coil springs have been firmly
attached, start assembling the spindle and brake hardware. Often
forgotten is this dust and grease seal that needs to be placed on the
spindle before any more items are added. Note the orange paint daub
from the original spindle.
You can now attach the dust seal, caliper bracket, backing plate and steering arm onto the spindle making sure the steering arms face forward. On drum brakes simply install the dust seal, fully assembled backing plate, brake hardware and steering arm onto the spindle. Once tightened, install the freshly rebuilt or replacement rotor with repacked or replacement, bearings, races and seals onto the spindle. Now attached the new or rebuilt caliper onto the rotor using two brake mounting bolts per caliper and lubricated with anti-seize thereby holding the calipers in place on the caliper brackets.
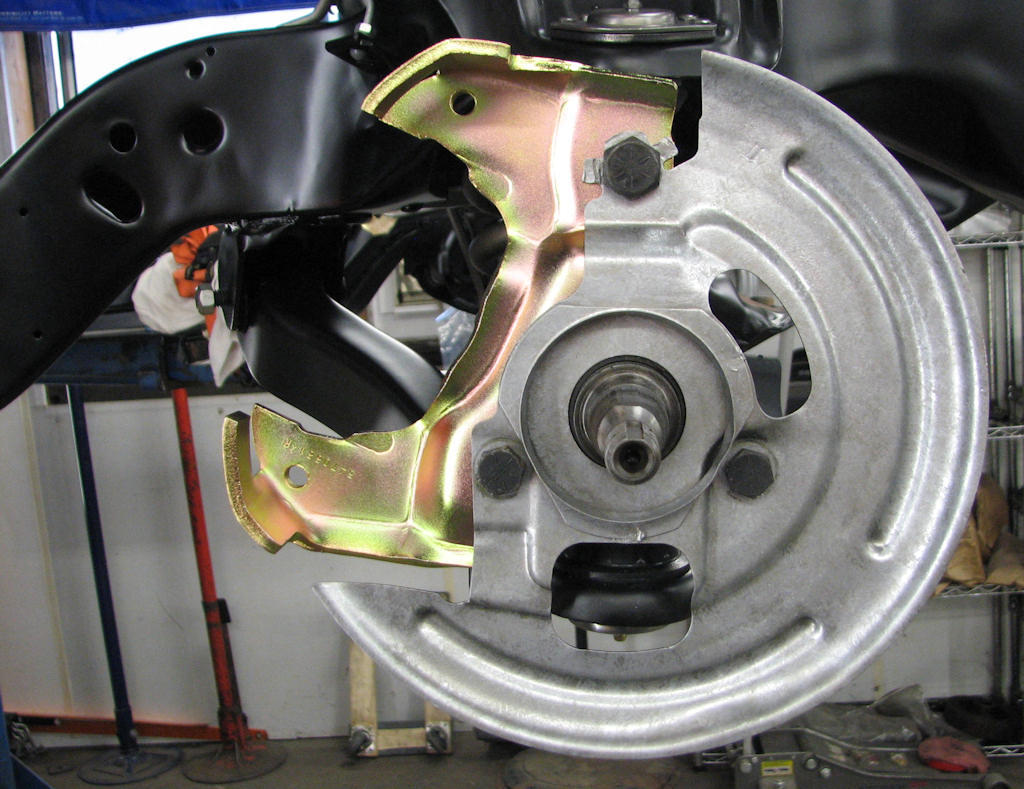
Install the brake caliper bracket, backing plates, and steering
arms onto the spindle. Tighten all bolts and lock nuts to
specifications. Once completed, the assembled rotor can be installed
onto the spindle.
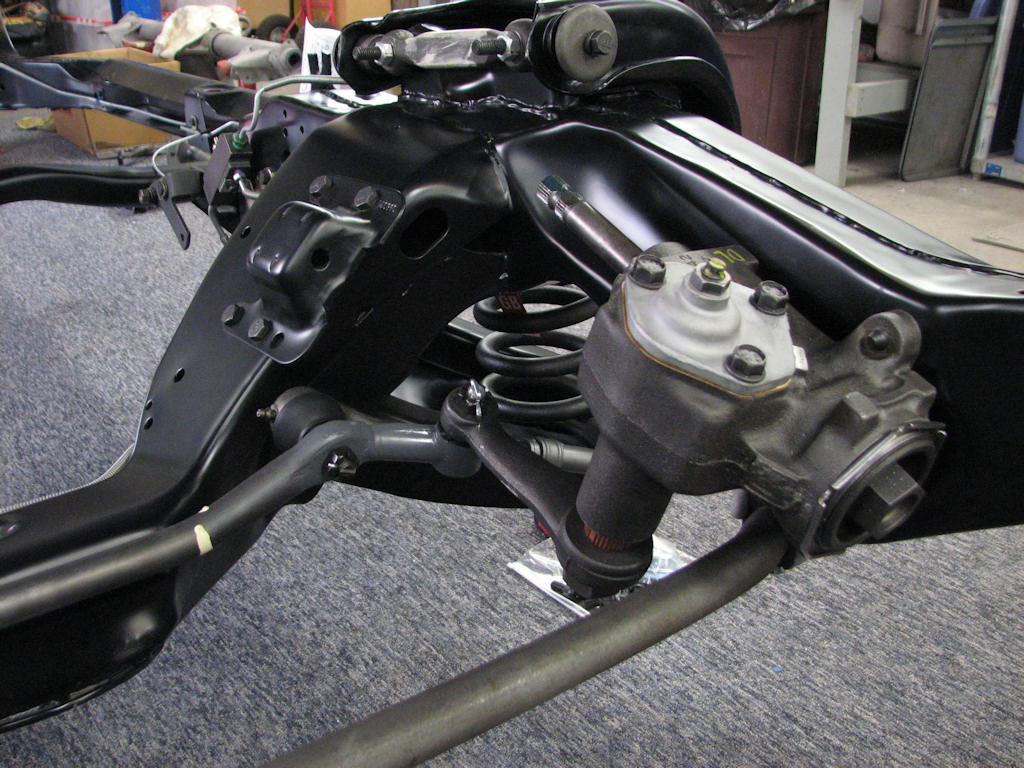
Install the steering box with the three mounting bolts. Both
will install in a similar manner onto the frame. From that point,
install all the front steering control hardware onto the steering
arms, idler arm, and pitman arm.
Complete the opposite side just as you had done previously. Install the manual or power steering box onto the frame and tighten the three mounting bolts. Install the pitman arm onto the steering box. Once completed, install the center link as well as the tie rods and sleeves onto the front suspension steering arms and snug down the castle nuts. Install one end of the center link onto the pitman arm and snug down the castle nut.
Now mount the idler arm onto the other end of the center link and again attach the castle nut. Once done, install the idler arm and tighten to the frame with the two mounting bolts, washers and stop nuts. Once all is in place, go back and tighten all the castle nuts firmly down with the cotter pins holes exposed.
Install the appropriate sized cotter pin into its location and bend one end over the nut and the other at a 90* bend downwards. Trim as necessary to fit. Your front suspension is now complete. Add your wheels and tires onto the frame so that it will be mobile for you to move around in anticipation to mounting the body onto the frame.
Engine and Transmission Installation, Body On/Off
You can now install the engine and transmission onto the frame at this time if you chose using the opposite procedures you used when removing them or you can install them after you lower the body onto the frame. There are pros and cons to both so which ever works best for you will determine which way you chose.
Before installing the body onto the frame, place all the emergency brake cables in place. Starting with the primary cable, run this thru the front frame access hole and out the backside using a Mickey Mouse clip to retain it in place. Make sure the cable runs below the transmission crossmember. Install the intermediate brake cable and saddle onto the primary cable and thread on two fine threaded nuts a few threads onto the end of the primary cable to hold the saddle and secondary cable in place. Place the large, several inch long “C” hook into the hole on the crossmember and onto the intermediate cable.
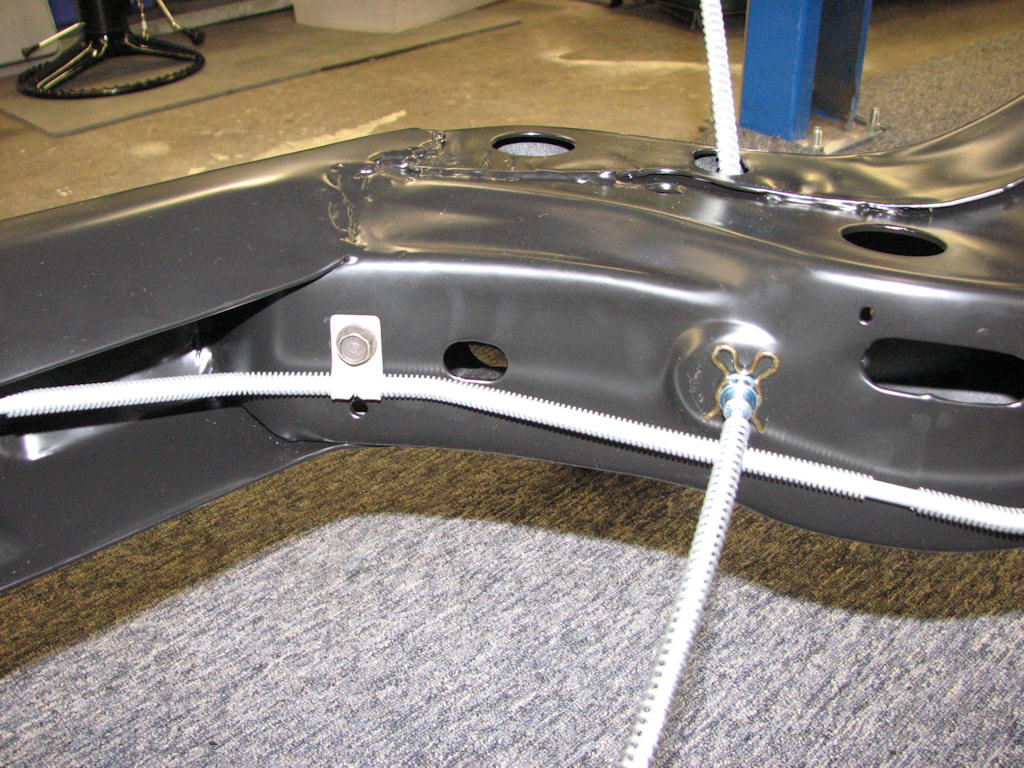
The primary emergency brake cable can now be installed onto the
frame in anticipation of lowering the body onto the frame. Use of a
Mickey Mouse clip here will hold the cable in place. Once the body
is being lowered onto the frame, the front end of the cable will be
fed through the hold in the body and attached to the emergency brake
pedal.
At this point run each end of the intermediate cable to the rear and attach them to the rear emergency cables using the smaller “C” cable holders, one per side. The last parts to install are the cable tensioner “S” hooks, one per side. These can be attached now or after the body has been lowered onto the frame. One end will hook around the intermediate cable while the other end will hook into the bottom of the car.
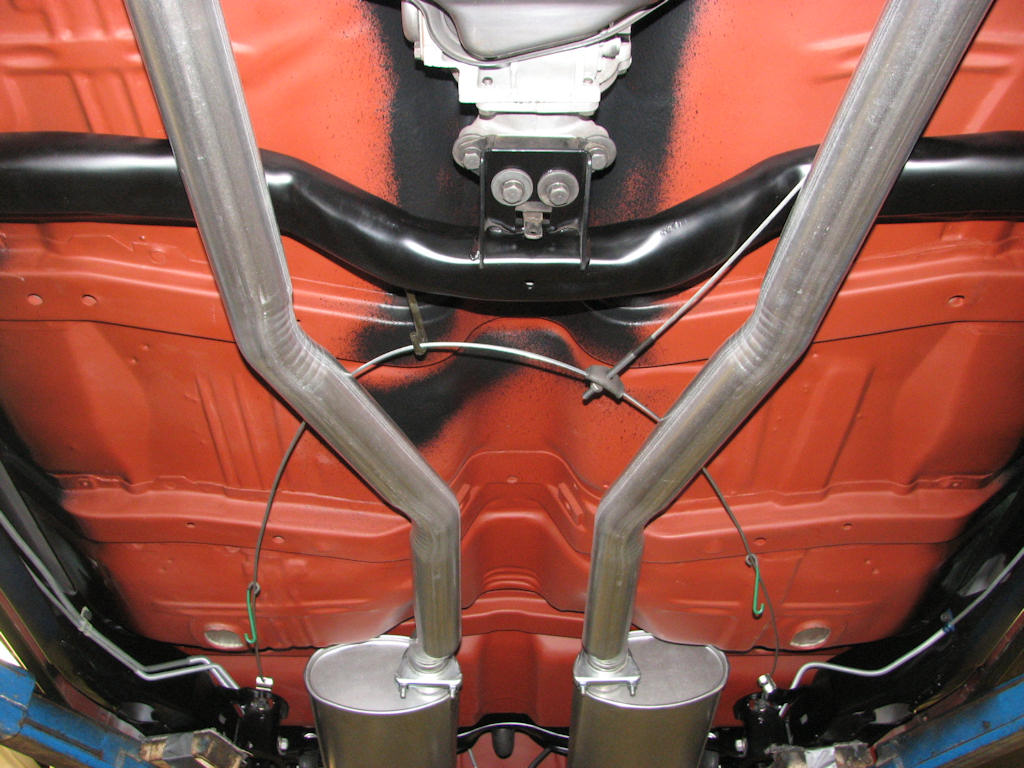
The entire emergency brake cable assembly can be seen here. The
primary cable is attached to the intermediate cable with the use of
a saddle and two nuts to hold it on as well as apply tension. The
large S-hook is attached to the crossmember, and two smaller
S-clamps hold the intermediate cable to the rear cables. The small
S-hooks will be attached once the body is lowered onto the frame.
Tighten all brake line fittings at this time using a flare wrench. Once the body has been lowered on the frame and completely assembled, you can then tighten all the front and rear suspension lock nuts on all of your bushings. The car must be on the ground with full weight on it before you tighten them. A common reminder is to write on a piece of tape and attach to the firewall or windshield with reminders of what steps need to be taken once the body has been lowered and assembled on the frame. You will also need to align the front suspension but this will need to be one of the last things you do when completing the cars restoration.
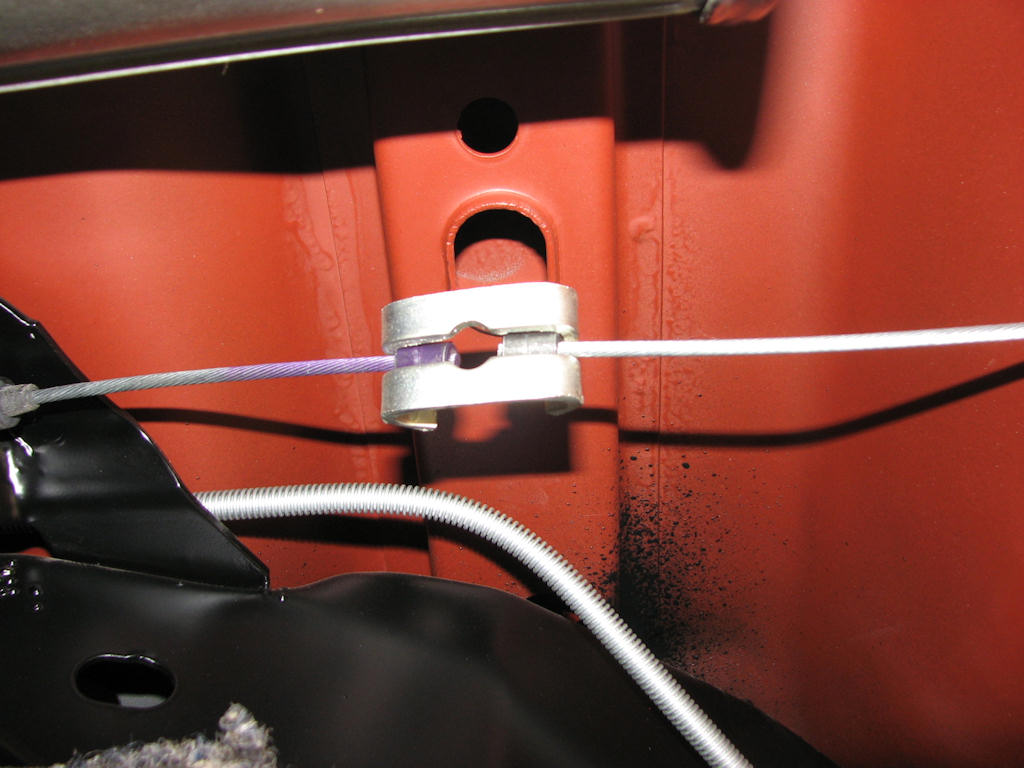
This small C-clamp will couple the intermediate cable with the
rear cable and is mounted at the front end of the rear cables. Slip
the ends of the cables through the access hold in the C-clamp and
pull tight.
Whether you chose to install the engine, transmission, drive shaft and exhaust now or wait till you have lowered the body onto the frame will be your decision. As was said earlier, there are pros and cons to both. Regardless of which you choose, things will really start getting exciting now.
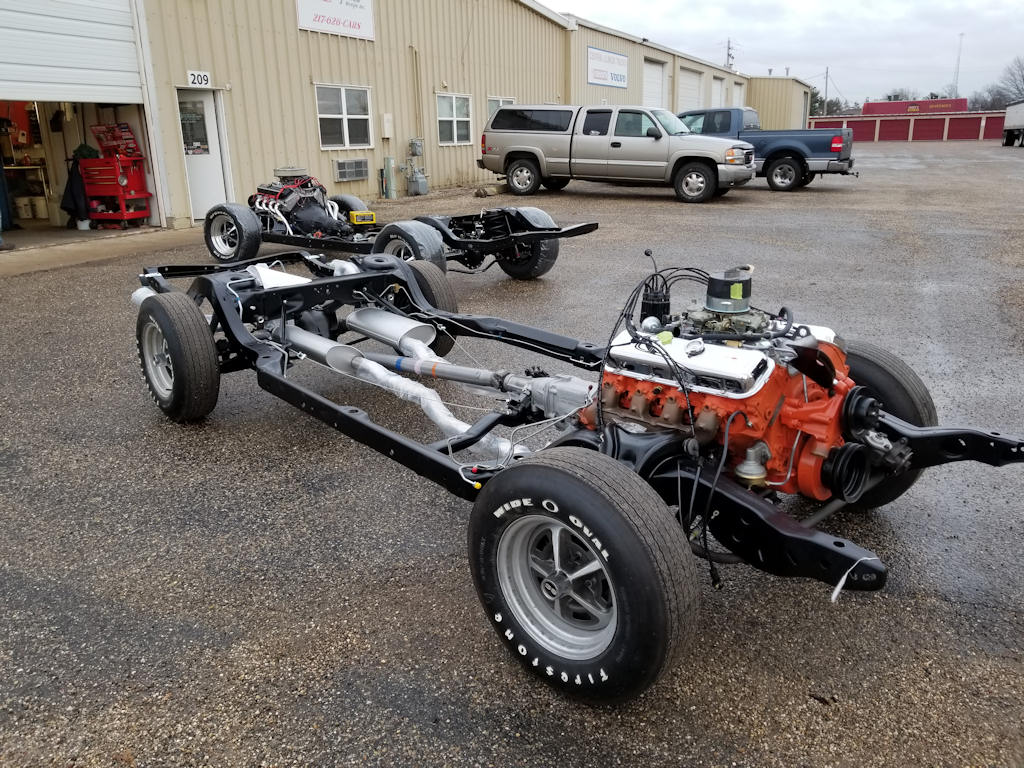
Your finished rolling chassis will surely get your heart
pumping. Just seeing the progress you have made will give you added
momentum to finish the balance of the project. Once the body is
completed and painted, it can be mounted back on the frame, and thing
will start to come together rapidly.
| Chapter 4 - Chassis, Suspension, and Brakes © Chevelle Restoration |


 |