Chassis, Suspension, and Brakes

The chassis and associated components is usually one of the grungiest
and has the most worn out parts of the restoration you will encounter
due mostly to the fact that it is out of sight to most and therefore
neglected. The undercarriages are usually in very bad shape with
pitting, many bent areas due to previous wrecks or hastily put floor
jacks, welds showing ill gotten repairs, oily residue, cracked or
worn out bushings just to name a few. All of these issues will have
to be addressed on a full blown restoration and, for obvious safety
reasons, even to rebuild your Chevelle into a quality daily driver
or weekend cruiser.
Chassis Disassembly
To what length you decide to take it will be up to you taking into
account whether the car will be a daily driver or a trailer queen
and will also depend on how much time and money you are willing
to spend on that part of the restoration. Many people will not put
much emphasis on the chassis due to it, for the most part, being
unseen while others will expect the same attention to detail on
the chassis as what goes into the body. Even the most basic restoration
should pay particular attention to suspension parts like ball joints,
bushings, and especially your brakes. Good suspension workings can
not only save you grief down the line but could potentially be a
literal life saver.
Regardless of your intentions, keep a note book and pen handy
and use it to not only make notes of your findings but more importantly
make note of any parts that need to be found or purchased as you
remove the defective part from the car. Digital cameras are also
an inexpensive investment or even a smart phone as a last resort
to assist you in documenting your work.
Cleaning and Inspecting the Frame
Assuming body has likely been removed, this will leave the chassis
fully exposed for you to now start your inspection and restoration
on. It is highly recommended you begin with a good pressure washing
to get as much of the oily film, road grime and remaining residents
removed from the car before you begin the tear down. Always keep
on the lookout for any factory tags or decals and document them
before you pressure wash the frame. Keep in mind where you are going
to be doing the cleaning as all the removed grime will have to go
somewhere and it is illegal in most residential areas to drain this
down the storm drains in the streets. You may want to instead take
it to the local self wash as they generally have catch tanks designed
for this runoff and they are legal.
After a good cleaning and scraping and just like in all the other
chapters you will want to photo document every part of the frame
and its bolt on parts for component placement, damage, brake and
fuel line placement, location of specific clamps, cracks, inspection
marks and stampings just to name a few. Do an initial inspection
and photograph everything and then again when it is fully disassembled
for areas that may have been missed. You will be tempted to think
…I’ll remember that condition… or …I’ll remember where that goes.
Trust me, you won’t and photographs will become invaluable to not
only you but if you sell the car on someday, it will be an additional
selling point. Not all frames were assembled the same throughout
the seven different plants so if you are reasonably sure that your
frame has been unmolested, document its assembly, especially things
like motor mount to frame bolt orientation, crossmember to frame
bolt orientation, the different types of clamps used on the brake
and fuel lines, etc.
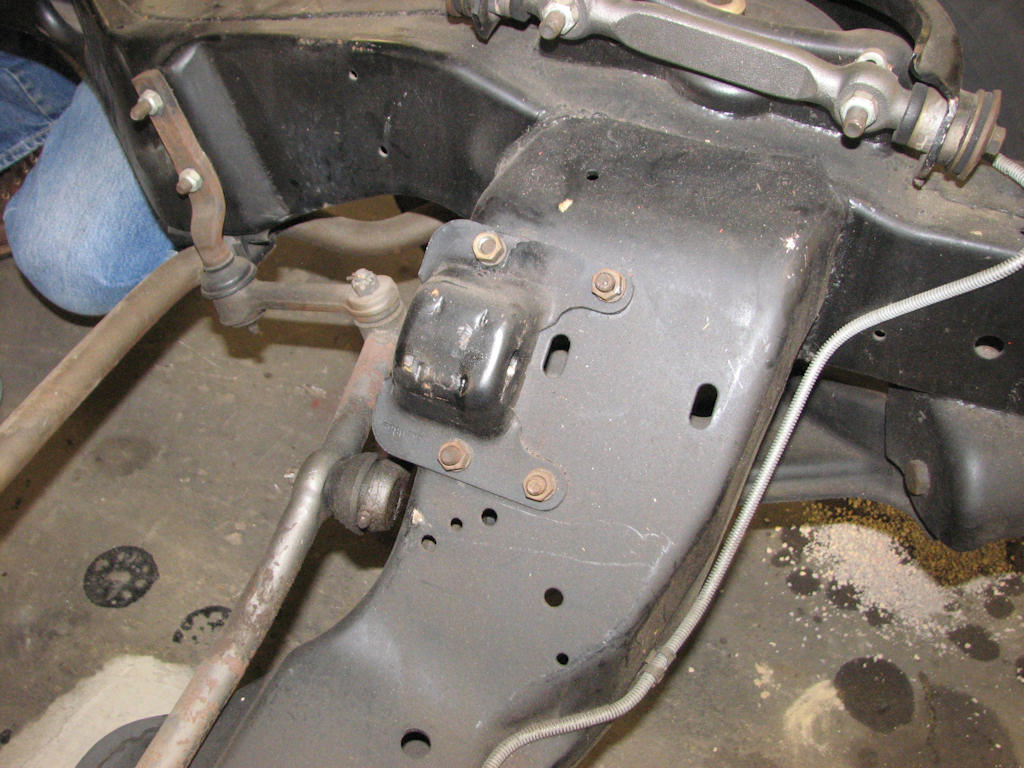
Make special note of items such as the
frame motor mount with regards to how the bolts are oriented. Some plants
install them with the bolt head on the top side while others, as depicted
here are installed with the nuts and lock washers on the top.
Take special note of things like the engine frame stands on the
frame. Note the orientation of the stands and how it is mounted.
Some plants installed the frame stand bolts from the top while others
(like shown in the photo) have the bolts coming from underneath
with washers and nuts on the top of the frame crossmember.

You may find the remnants of a frame identification decal like this
"XU" decal. Note that it is adhered to the frame rail upside-down.
It is upside down because when chassis and suspension components
are being assembled to the frame, the frame itself is upside down
making the decal right-side up during the assembly process. The
"XU" decal here is for a 1970 sport coupe, a 1970 convertible will
have "XV" and "XX" for an El Camino.
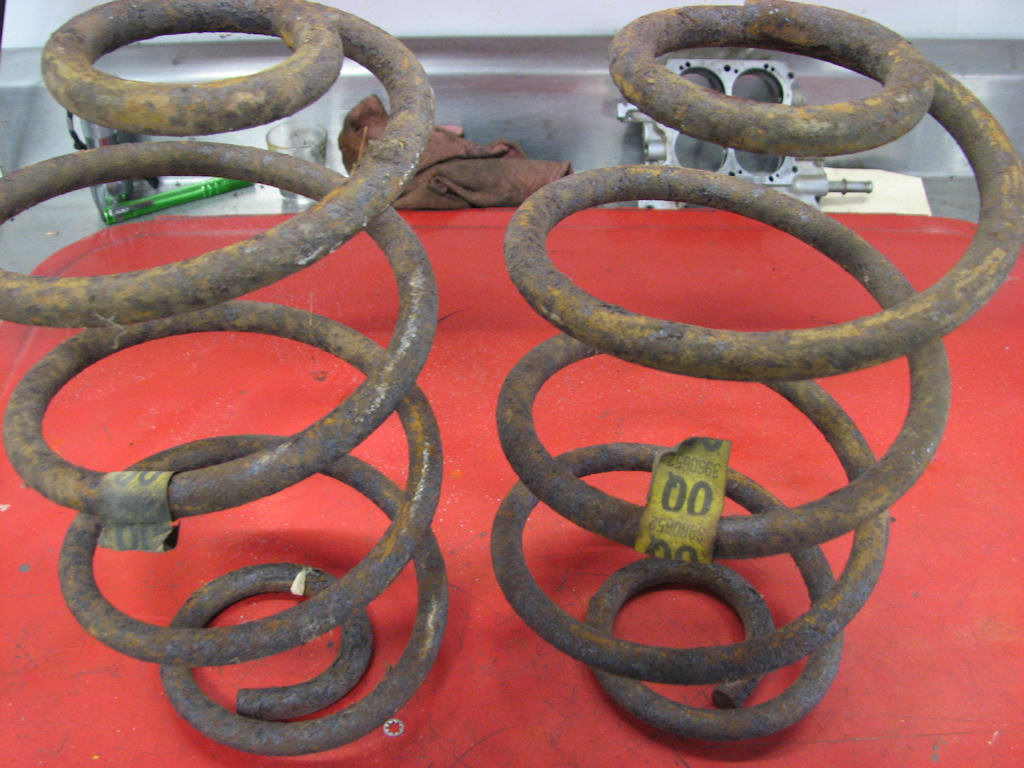
If you are lucky, you'll find remints of the tags used for the coil
springs. Typically the rear coils spring tags are black lettering
on a yellow tag and front spring tags are black lettering on a red
tag.
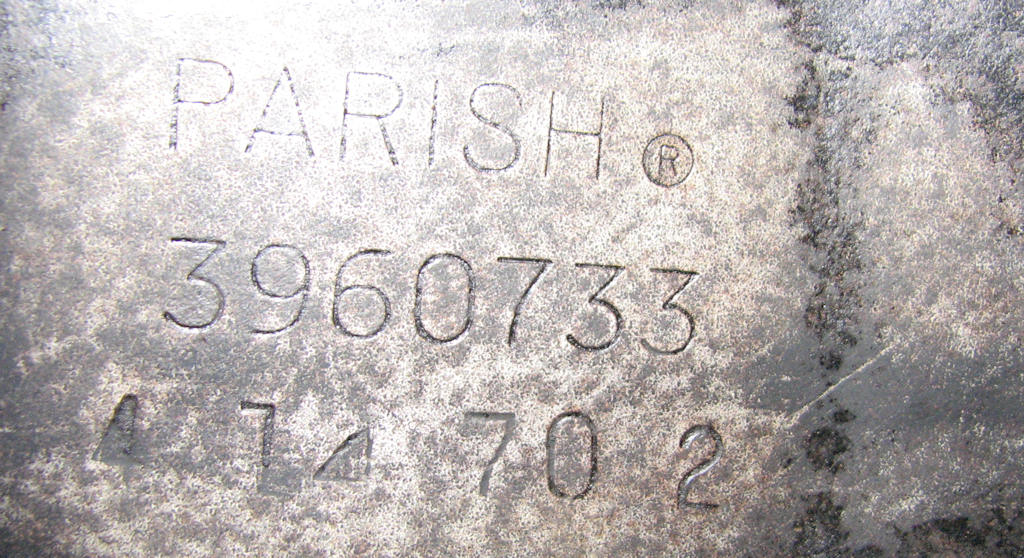
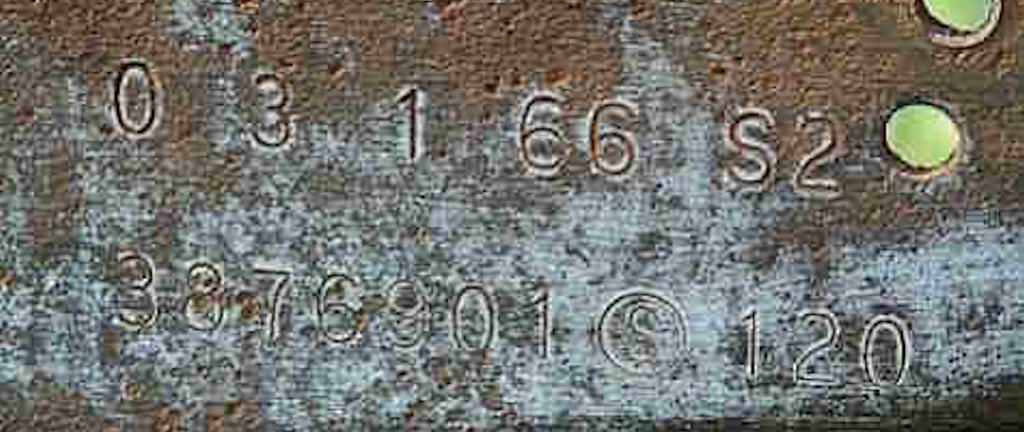
There should be markings on the frame rail with the manufacturer's
information on the driver-side rear just aft of the kick up of the
frame. The top example is a 1970 frame manufactured by Parish (Parish
Pressed Steel) with the frame's part number, 3960733 for a sport
coupe, the date, 4 14 70 or April 14, 1970, and the shift number
of the day, the second shift. The bottom example is a 199 frame
from A. O. Smith dated 03 1 66 S2 for March 1, 1966, second shift.
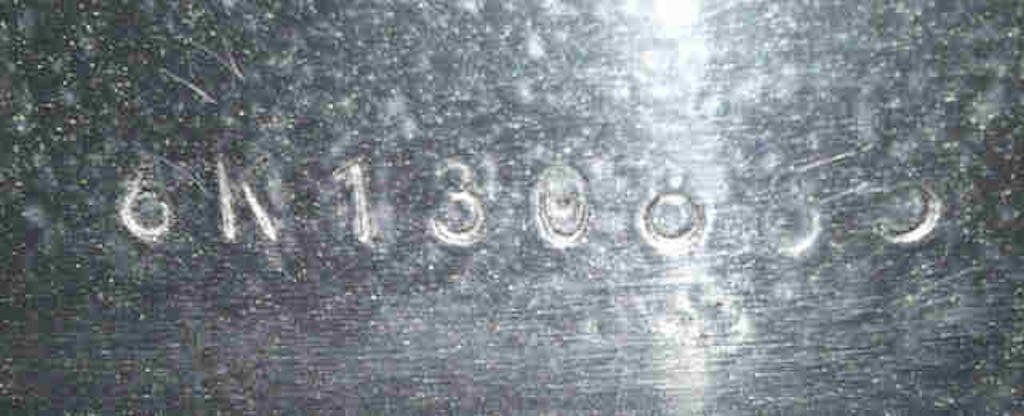
Most frames will have a partial VIN of the Chevelle it is being
used in. Depending on the year and plant this could be just about
anywhere on TOP of a frame rail. The idea for 'hiding' it was initially
only for law enforcement to know where it was in order to verify
the chassis belonged to the car in question. As restorers began
breaking cars down, they found these numbers and found they were
invaluable in identifying a legal car. Typically the partial VIN
will have the model year, final assembly plant, and the last 6 digits
of the Chevelle's VIN. Later years, 1968 on, may also have the number
"1" prior to the model year to indicate the Chevrolet division of
GM.
Not all plants stamped these on the frame even though it was
a federal mandate in 1970. These can usually be found on a variety
of different places on the rear half of the frame and usually on
the top side. You may not find any or as many as three stamps. When
originally stamped they were very faint even when new and after
almost 50 years of weathering can be nearly if not impossible to
find. Some plants did not follow the mandate and did not stamp the
frame with a partial VIN. The partial VIN will not include the series
or body style, such as the ‘13637’ portion of a typical VIN.
One thing to keep in mind about partial VINs on the frame, unlike
the engine and transmission, the frame is formed steel so stamped
partial VINs may be very difficult to read.
It is a good idea to start a separate file within your car’s
main restoration file and call it something like ‘Frame and Chassis
Components’ so that you can easily track all the facts and progression
of the restoration. If you are doing a concours restoration and
the condition allows for it, make sure to document any component
parts that have decals still attached as well as what type of finish
that particular component may have had.
Decals such as the frame broadcast code, coil spring identification
tags, shock, power steering gear, rear axle, and many others should
be documented for future replacement. The color and part number
on the decal as well as its physical location on the item should
also be noted. This is also a good time to do a preliminary documentation
of the colored paint inspection marks commonly found throughout
the front suspension and rear differential components. These are
vitally important to replicate on a highly valuable collector car
to bring the degree of the restoration to a higher level. A more
in depth documentation can be done during the individual parts cleaning
process as well which will be covered later in the reassembly part
of this chapter.
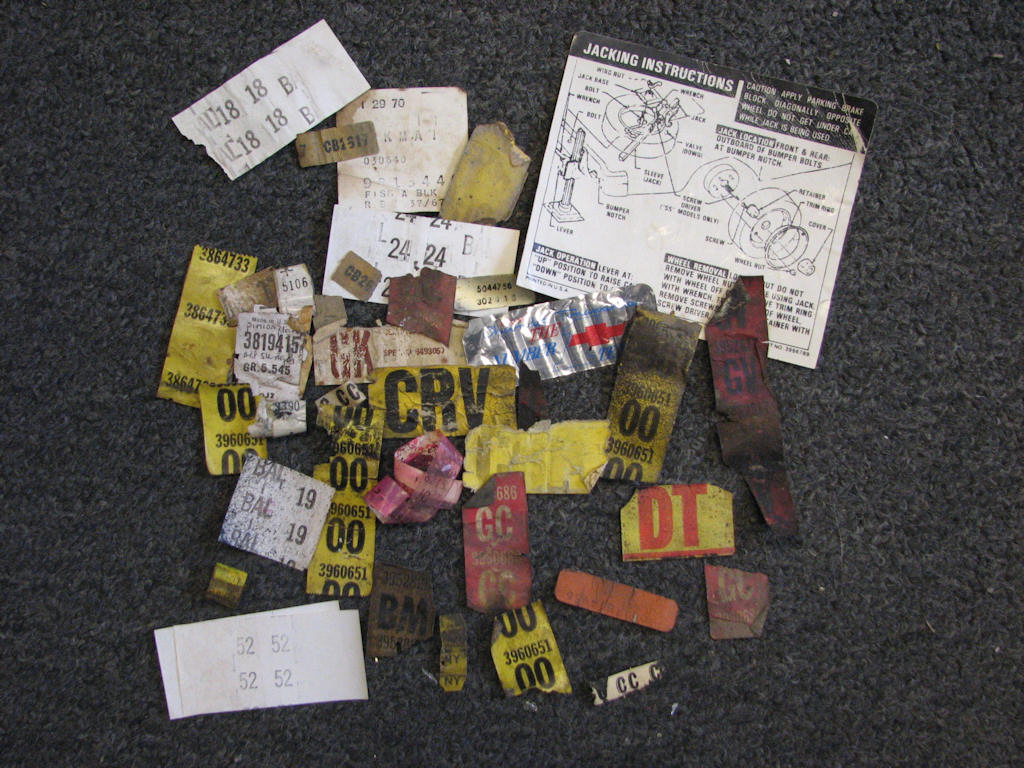
Save all the decals that you can from
the car and chassis as you find them. This is just a small selection
of decals you might find on your Chevelle during your restoration and
cannot only be helpful in replicating them but also confirming and documenting
what your car was originally.
Once you have documented everything that you can, very carefully
try and remove all the decals. You will likely not be able to save
them but can use them later as a reference and replace them with
decals that closely resemble the ones you removed and save them
in your car’s personal file. If you are only doing a driver quality
restoration you may not be concerned with these items so use your
own judgment.
Chapter 4 - Chassis, Suspension, and Brakes
© Chevelle Restoration
|


 |