

Typical Engine Monitoring Gauges
1964 & 1965: The 1964 & 1965 Malibu SS came standard with oil pressure, water temperature, and amp gauge. A tachometer was optional in all 1964 & 1965 Chevelles under RPO U16 for all V8 Chevelles.
1966: Instrument panel gauges were optional on all L6, Malibu and SS 396 sport coupe, convertible, and pickup series under RPO U14 and a tachometer was part of RPO U14 on all V8 installations. Separately the tachometer could be ordered under RPO U16 on any V8 Chevelle regardless of series.
1967: Instrument panel gauges were optional on all V8 Malibu and SS 396 sport coupe, convertible, and pickup series under RPO U14 and a tachometer was part of RPO U14 on all installations. Separately the tachometer could be ordered under RPO U16 on any V8 Chevelle regardless of series.
1968 through 1972: Instrument panel gauges were optional on all V8 Malibu and SS 396 sport coupe, convertible, and pickup series under RPO U14 and a tachometer was part of RPO U14 on all installations. RPO U16 for the individual tachometer was dropped as an option in 1968 (however, Chevrolet did offer an accessory tachometer that could be dealer installed). The 1968 model year would be the last year for a mechanical oil pressure gauge; the 1969 model year saw a change to an electrical oil pressure gauge; the 1970 model year saw the oil pressure gauge disappear in favor of a warning lamp.
Aftermarket Gauge Installations
There have been aftermarket gauges available for quite a number of years so they are nothing new. There are numerous aftermarket manufacturers and hundreds of different styles and sizes over the years. Many gauge sets (2 or 3 gauges in a single panel) have installation instructions as well as wiring required, sending units (if applicable) and various installation materials. Often individual gauges do not include any installation materials beyond the instructions so you must decide what your needs are.
Some gauges, such as water temperature and oil pressure can be purchased in either mechanical or electric versions. There are plusses to both so I won't debate the pros and cons of each, I'll leave that up to you.
The following are instructions for Auto Meter gauges but should apply generically to any brand. Be sure to check the instructions that came with your gauge(s).
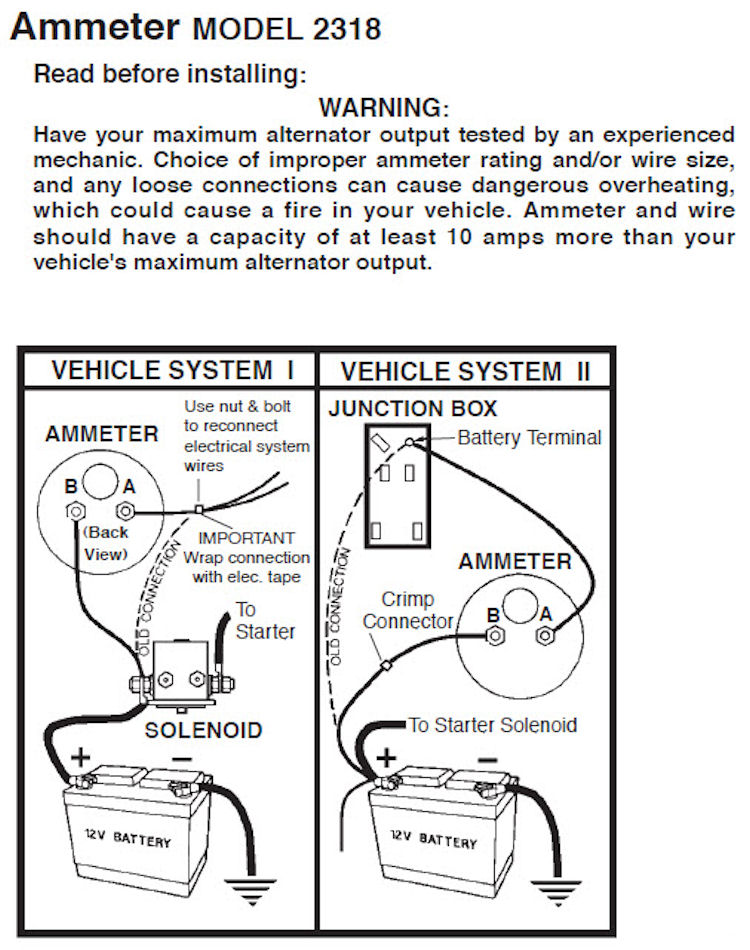
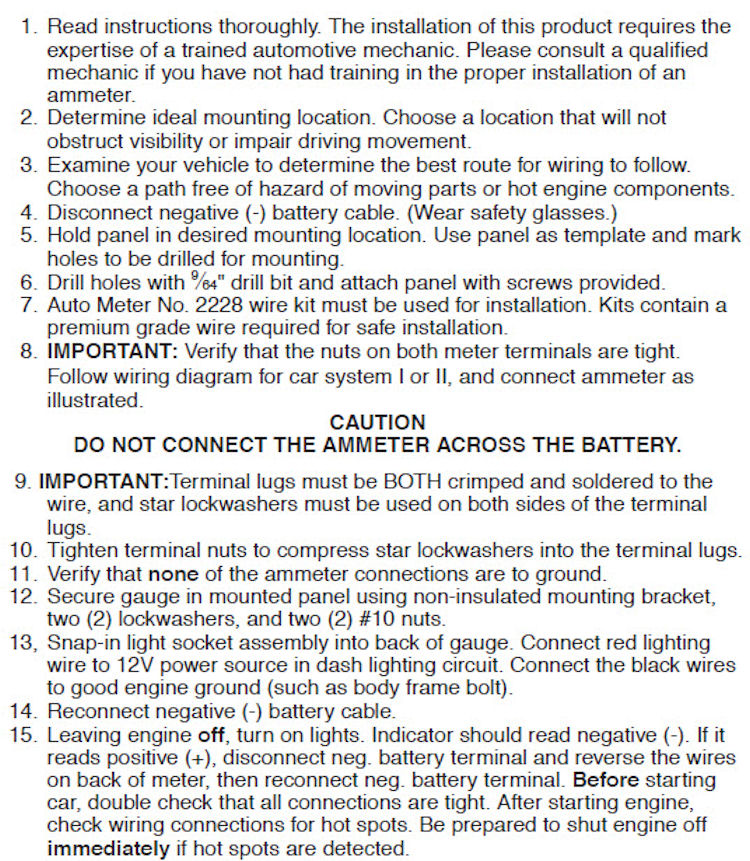
Ammeter
Ammeters have pretty much fallen out of popularity and replaced with a volt meter. But, here's a typical installation for an ammeter.
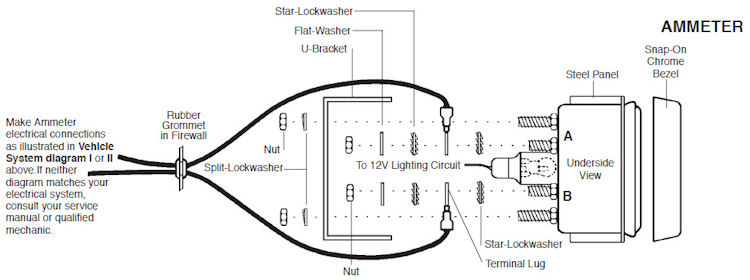
Voltmeter
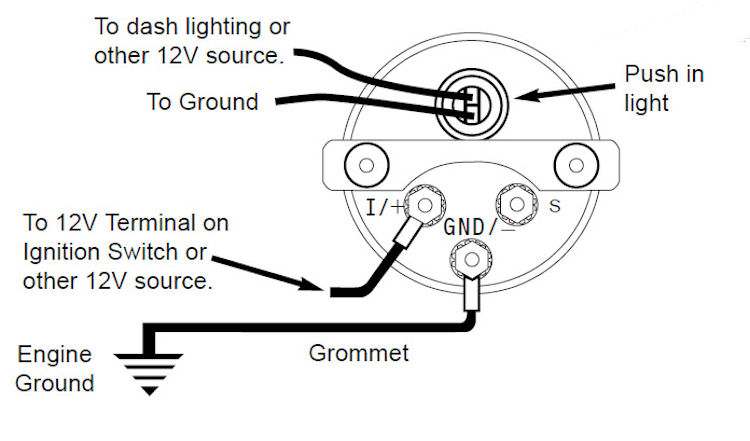
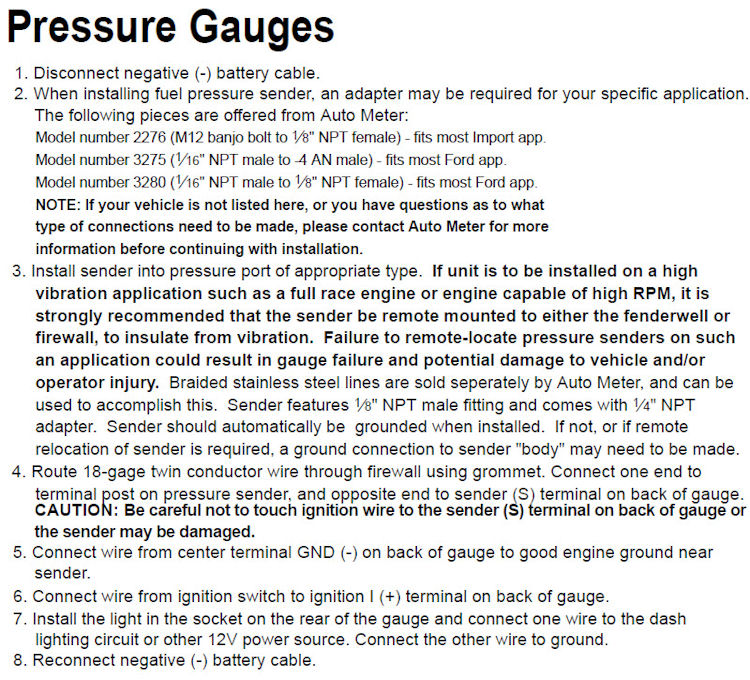
Pressure - Electric
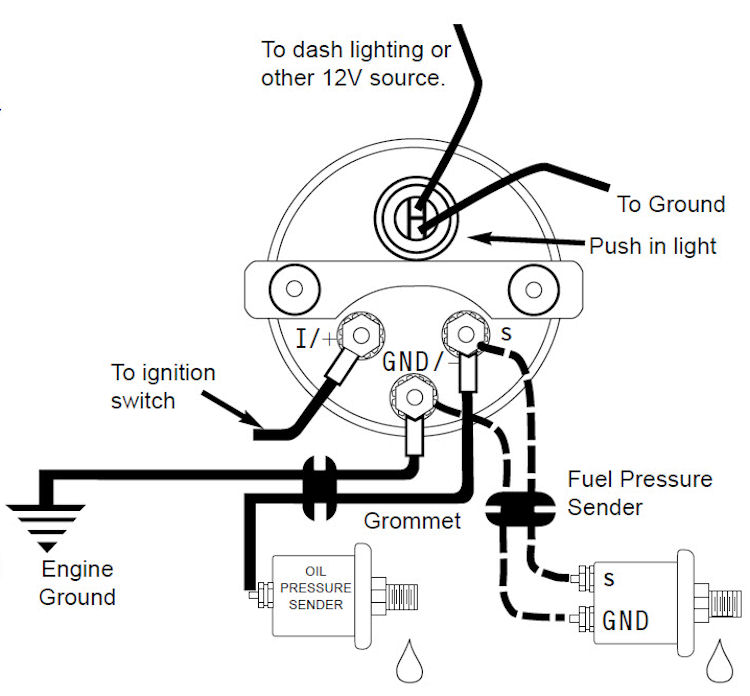
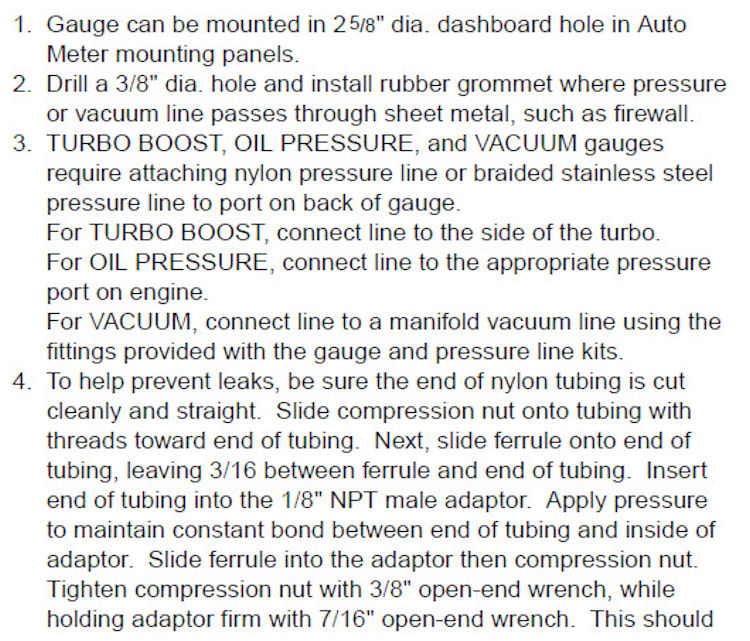
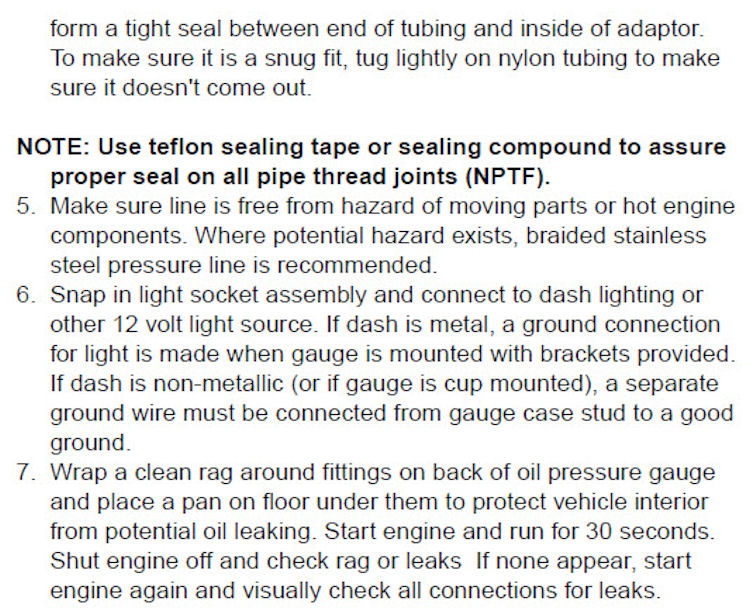
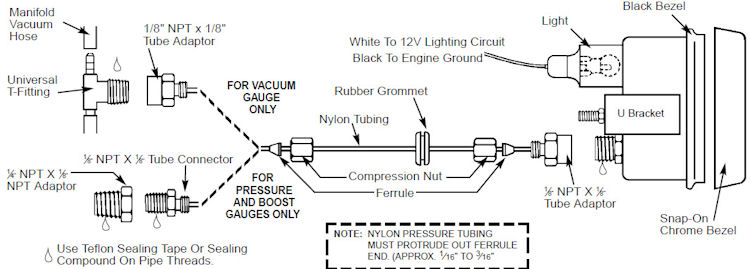
Pressure/Vacuum - Mechanical
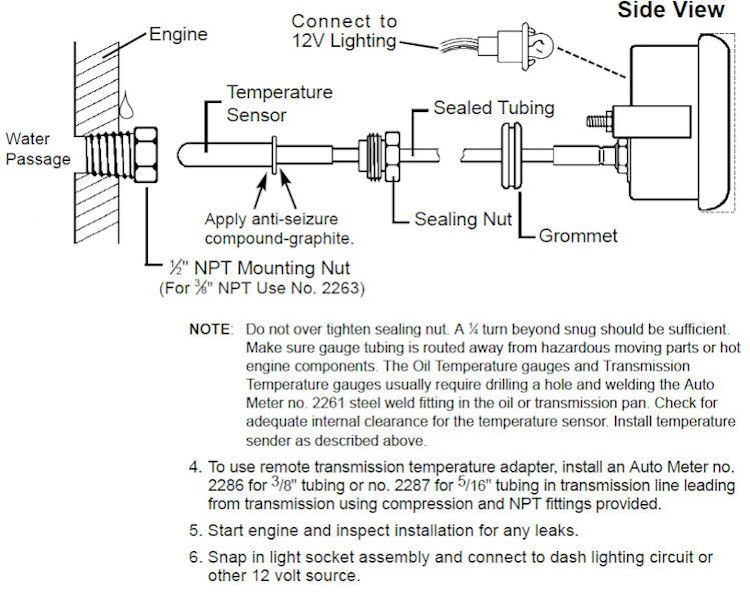
Temperature - Electric
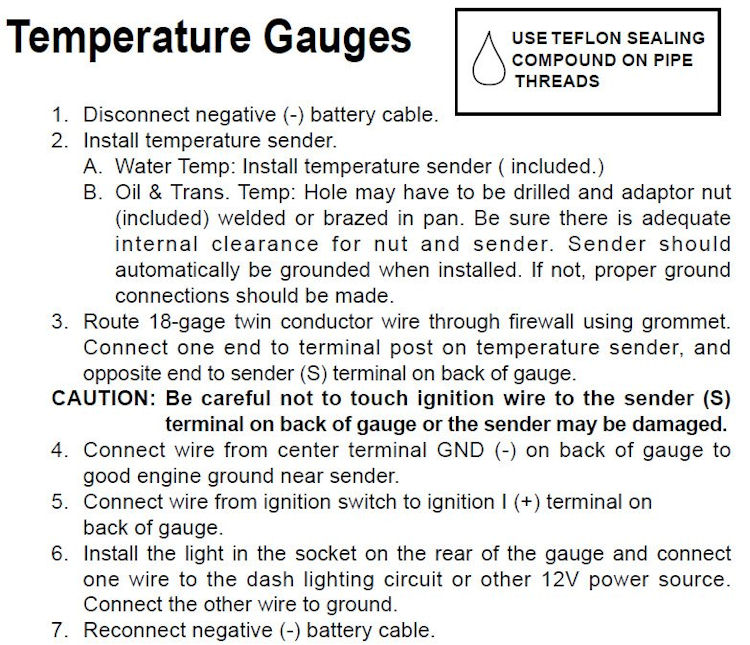
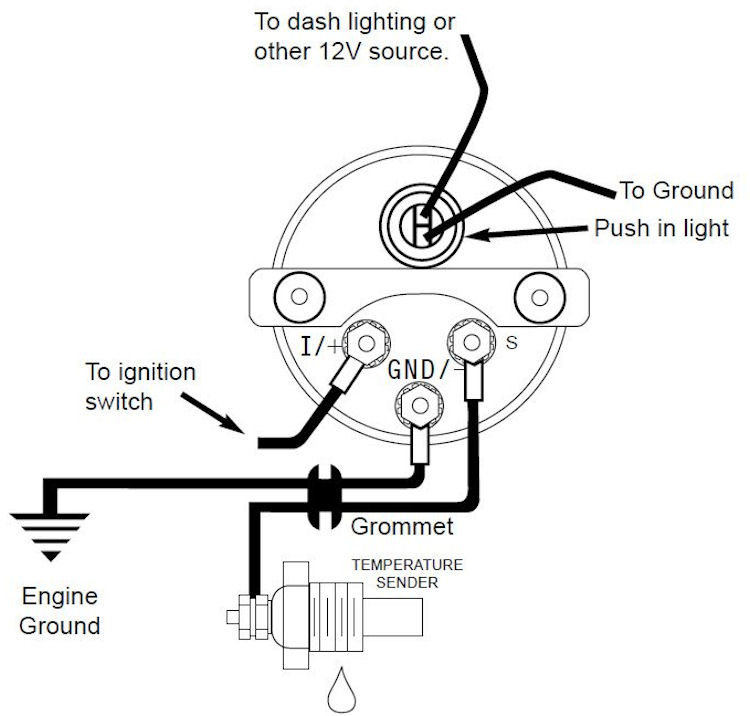
Temperature - Mechanical

Tachometer
** Be sure to consult your tachometer manufacturer's instructions and wiring requirements.**
For points and some electronic ignition systems, installation of a tachometer is pretty straight forward. You will probably have 4 wires from the tachometer, white, red, black, and green.
The white wire is typically for the light in the tachometer. Some people prefer the tachometer lamp be lit whenever the ignition is turned on and some prefer that the tachometer only be lit when the dash lights are lit. To have the lamp lit all the time splice into a wire that's ignition hot - wire is hot whenever the engine is running. To have the lamp lit only when the headlamps are on you'll need to splice into an existing dash lamp.
The red wire is connected to an 12v ignition hot circuit and should be fused before the tachometer with a 4 amp, 3 AG fast-acting type cartridge fuse.
The black wire goes to a good engine ground.
The green wire connects to the negative side of the ignition coil or to the tachometer terminal on electronic ignition such as an MSD ignition box. Be sure to check with your MSD instructions for exact location.