Body Section Links
BODY EMBLEMS
EMBLEM DRAWINGS AND PLACEMENT
Exterior Dimensions
Glass
Grille
Hood
MOLDINGS
PAINT COLORS
Potpourri
PRODUCTION CALENDAR
PRODUCTION NUMBERS
SERIES/MODEL
SS 396 Stripes
Sheet metal
TRUNK/COVE
Trim - Chevelle 300
Trim - Chevelle 300 Deluxe
Trim - Malibu
Trim - SS 396
Trim - El Camino
Trunk and Rear Cove Panel
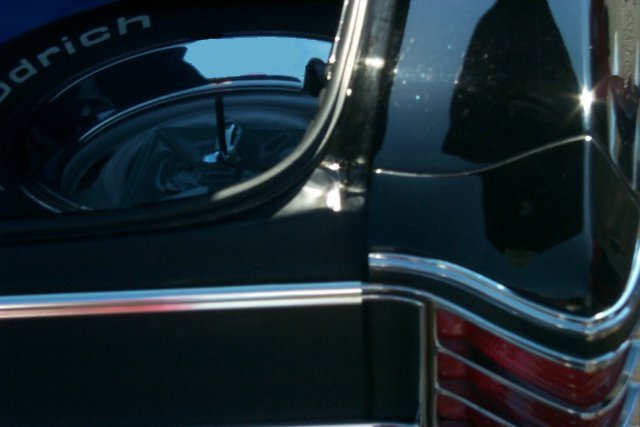
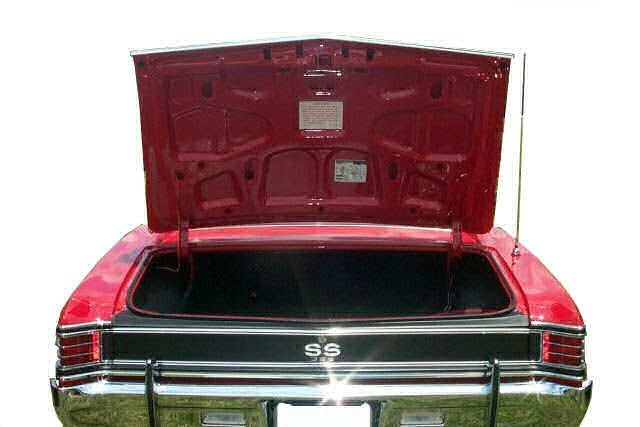
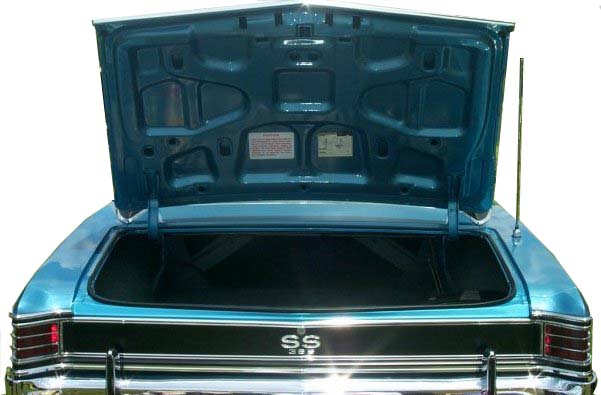
One area often overlooked in repairing or restoring a 1967 Chevelle is the trunk and rear cove area. Many fail to properly paint the small area between the cove and the rear trunk opening. All Malibu models and SS 396 sport coupes and convertibles had this area painted a satin black. Sometimes the black follows the weld seem, sometimes it is a diagonal line, and sometimes a horizontal line. Whether these are plant specific or date specific is not known at this time but examples below are sporadic so it may have just been the painters-of-the-shift choice. Also note that many of the examples here have been repainted and the current paint line above the cove may or may not be the way it came from the assembly plant. Since many examples below have been repainted in their lifetime and show different treatments of the area above the cove, only those shown that have NOT been repainted can be confirmed as accurate.
Early promotional photo shows the satin black paint scheme. Also note both the 300 Deluxe and Malibu CHEVELLE rear cove trim and nameplate. The problem with the photo is the 300 Deluxe did not receive the CHEVELLE nameplate on production models, the CHEVELLE nameplate was only used on the Malibu series and the Malibu did not use the rear cove emblem. Also note the trim between the cove and the trunk area, this too was only used on the Malibu and the SS 396 series Chevelles and neither the 300 nor the 300 Deluxe received the satin black paint scheme (as shown in the photo below), only the Malibu and SS 396.
Of those below with body assembly dates known, here's a breakdown by plant and date.
As you can see from the variety there did not appear to be a standard operating procedure for how to paint the blackout and any given plant. So, what's correct and what's not correct? That's probably best left up to you. If you do have information on Malibus or SS 396 Chevelles with this area in its original form, please feel free to pass that information along, preferably with any photos to document it, and note the plant and body date from the trim tag.
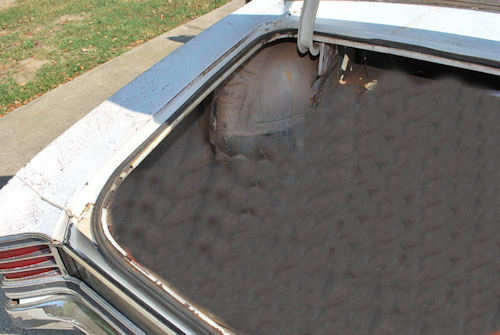
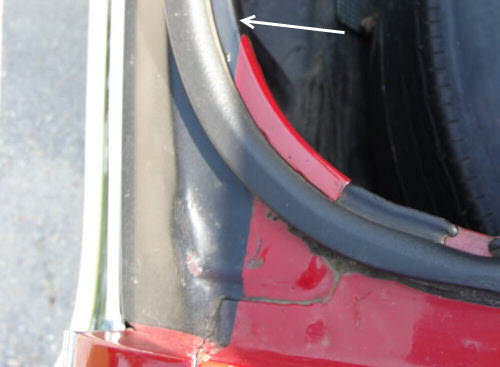
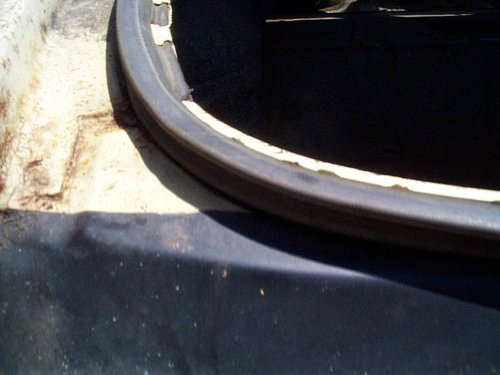
The weather strip lip was sometimes blacked-out and sometimes not. Sometimes the blacked-out area was only the full horizontal portion of the lip and sometimes (especially with horizontal across seams) the lower curved sections were also blacked-out if fair relation to the horizontal seam. There does not seem to be a pattern of this by plant or timeframe. It appears as though it was at the decision of the person(s) masking and painting at the time.
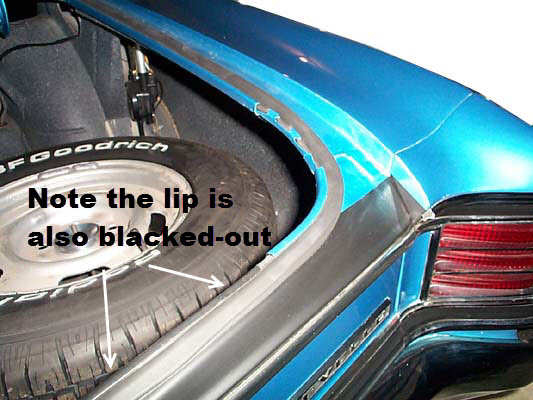
In both the Malibu (except wagon and El Camino) and the SS 396 the trunk area from the upper trim piece to the weather strip was blacked-out so it would match the blacked-out section on the tail lamp bezels when the trunk lid was closed.
| Plant/Date | Diagonal (45°) Across Seams | Matches Weld Seams | Horizontal Across Seams |
| Atlanta - 09E | x | ||
| Atlanta - 10C | x | ||
| Atlanta - 12B | x | ||
| Atlanta - 07x | x | ||
| Baltimore - 11D | x | ||
| Baltimore - 11E | x | ||
| Baltimore - 01D | x | ||
| Baltimore - 02B | x | ||
| Baltimore - 04A | x | ||
| Baltimore - 04C | x | ||
| Baltimore - 04C | x | ||
| Baltimore - 05B | x | ||
| Baltimore - 07B | x | ||
| Baltimore - 07B | x | ||
| Baltimore - 07D | x | ||
| Framingham - 10A | x | ||
| Framingham - 12C | x | ||
| Framingham - 01B | x | ||
| Framingham - 01C | x | ||
| Framingham - 02B | x | ||
| Framingham - 04C | x | ||
| Framingham - 04C | x | ||
| Fremont - 02C | x | ||
| Fremont - 03C | x | ||
| Fremont - 04B | x | ||
| Fremont - 04C | x | ||
| Fremont - 05B | x | ||
| Fremont - 06A | x | ||
| Fremont - 06D | x | ||
| Kansas City - 10A | x | ||
| Kansas City - 10C | x | ||
| Kansas City - 11A | x | ||
| Kansas City - 11D | x | ||
| Kansas City - 03x | x | ||
| Kansas City - 03B | x | ||
| Kansas City - 03C | x | ||
| Kansas City - 05A | x | ||
| Kansas City - 05A | x | ||
| Kansas City - 07C | x | ||
| Kansas City - 07C | x | ||
| Oshawa - 04D | x |
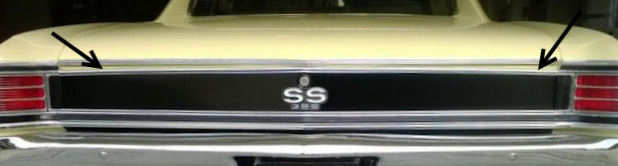
Paint diagonal across weld seams
|
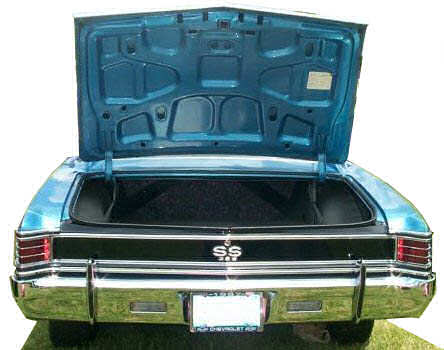
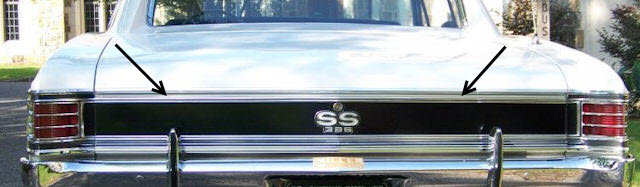
Paint matches weld seam
 A little hard to discern, but even a black Malibu or SS 396 got the same treatment. Click here for more following the weld examples |
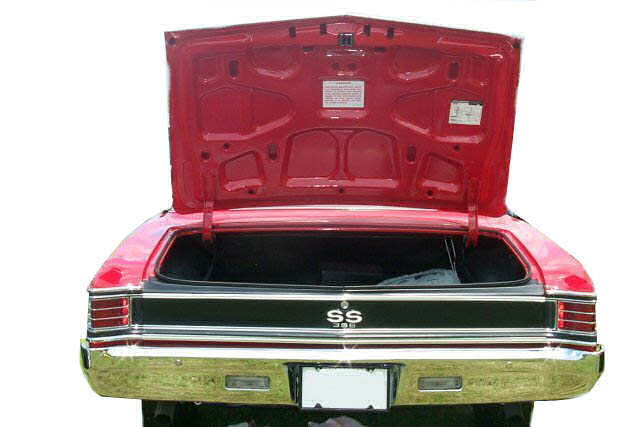
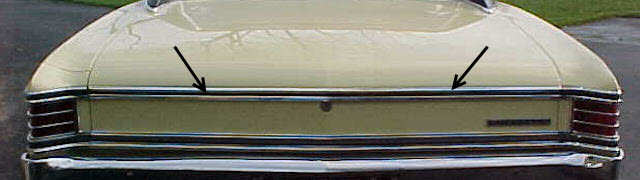
Paint horizontal across body
Click here to see more horizontal examples |


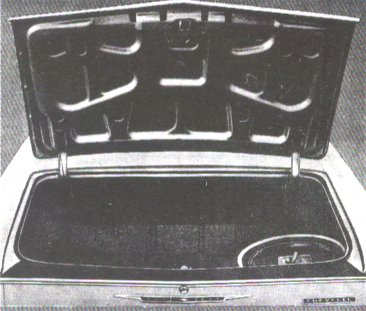
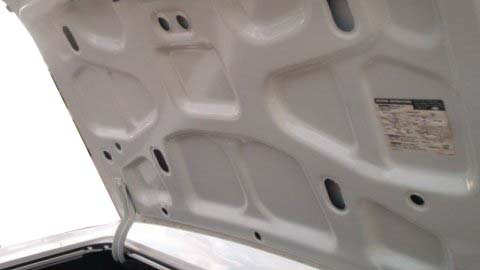
Another restoration area often overlooked is the placement of certain instructions on the underside of the trunk lid. While this may not have been of much importance to the assembly line worker and they could have been glued anywhere that was convenient for them, the AIM does indicate the proper placement of the various instruction sheets. Many original trunks have 'incorrect' instructions placement; that is to say, they are correct in as much as they are original to the car from its production date, but 'incorrect' as far as the AIM. The restored example immediately below has correct placement of the Positraction (left) and jacking instructions (right) according to the AIM while three originals from Baltimore and Kansas City show the jacking instructions in an 'incorrect' location.
Correct placement of instruction sheets according to AIM
But...
...note placement of the jacking instructions location on this original
untouched Malibu from Baltimore...
...and placement of the jacking instructions location on this original
untouched 300 Deluxe from Baltimore....
...and placement of the jacking instructions location on this original
untouched SS 396 from Kansas City.
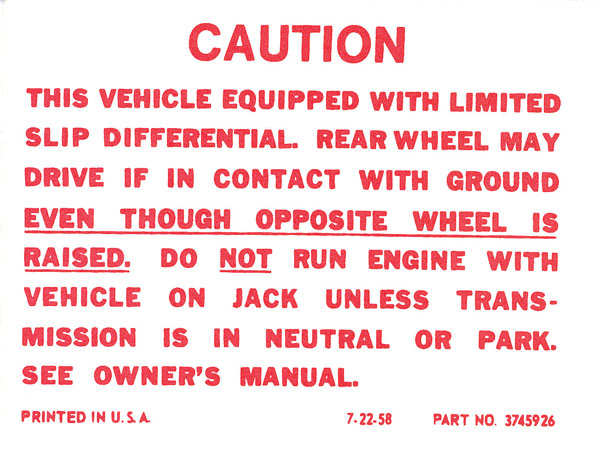
Positraction warning sheet, part #3745926.
Jacking Instructions sheet (no good photo), part #3803967 for all except wagon (#3903966) and pickup (#3963968).
Both labels were attached to their respective locations with GM adhesive, part #9985105.
Sedan/Coupe/Convertible
| 1. 3903967 Instruction Sheet | 2. 9985105 Cement (.30 oz.) | 3. 9785616 Nut Asm | 4. 3898166 Bolt |
| 5.
3841909 Jack
Asm 5. 3841910 Opt 5. 3841911 Opt 5. 3913086 Opt |
6. 3899546 Wrench Chart | 7. 3897539 Bracket Asm. |
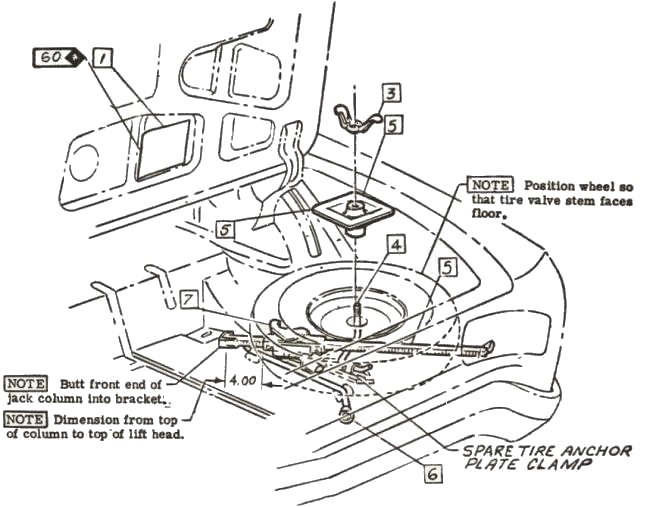
Station Wagon
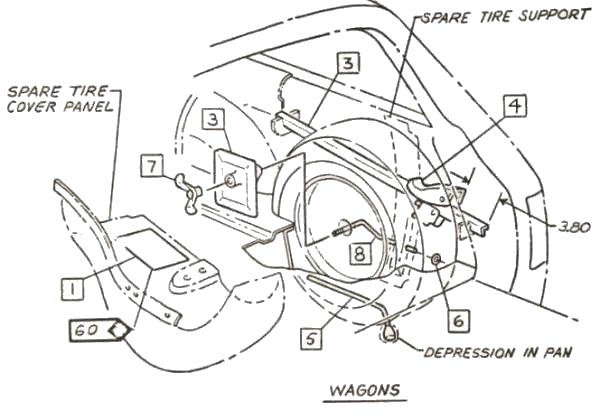
| 1. 3903966 Instruction Sheet | 2. 9985105 Cement (.30 oz.) | 3.
3903877 Jack
Asm. 3. 3859733 Opt 3. 3859734 Opt 3. 3903876 Opt 3. 3859757 Opt |
4. 3897539 Bracket |
| 5. 3899546 Wrench Chart | 6. 3818748 Nut Spring | 7. 9785616 Nut | 8. 3899525 Bolt - Wagon |
| 9. Position wheel so that tire valve stem faces jack asm. |
El Camino Pickup
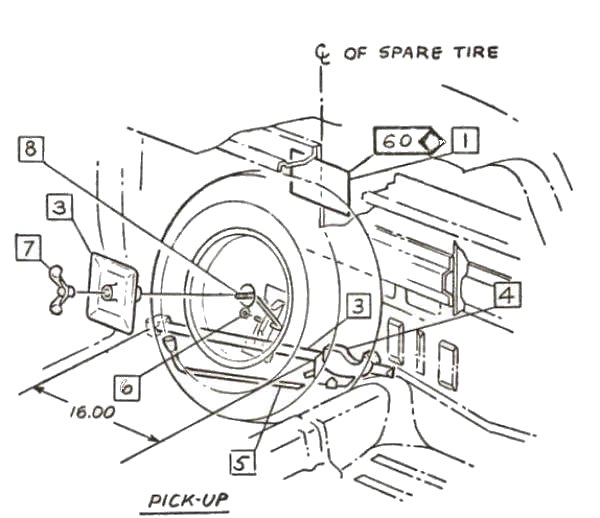
| 1. 3903968 Instruction Sheet | 2. 9985105 Cement (.30 oz.) | 3.
3903877 Jack
Asm. 3. 3859733 Opt 3. 3859734 Opt 3. 3903876 Opt 3. 3859757 Opt |
4. 3897535 Bracket |
| 5. 3899546 Wrench Chart | 6. 3818748 Nut Spring | 7. 9785616 Nut | 8. 3840781 Bolt |
| 9. Position wheel so that tire valve stem faces jack asm. |
A spare tire cover is furnished by Fisher Body and installed by Chevrolet
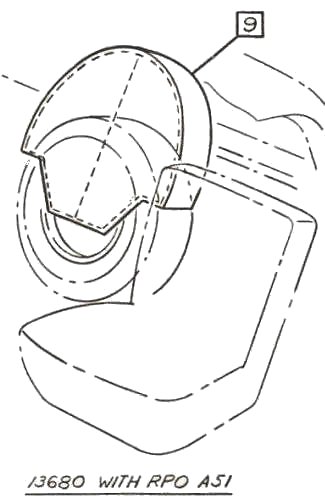
Spare tire cover furnished by Fisher Body and installed by Chevrolet.
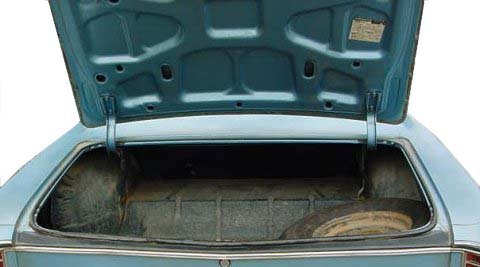
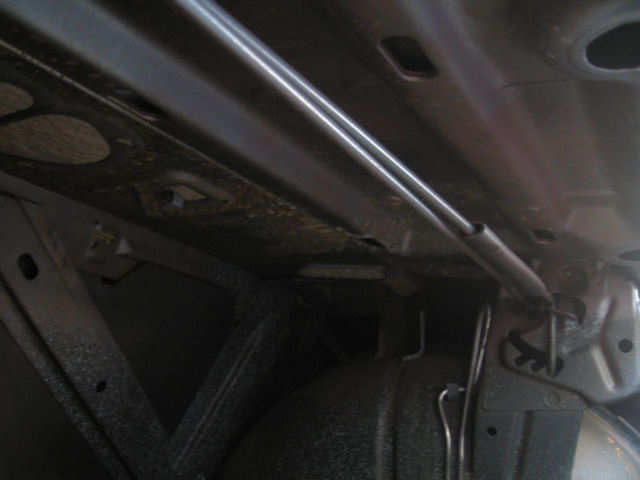
The underside of the trunk lid was painted body color. The trunk well was first given a coat of flat black then the trunk floor, each wheel well housing, inside of cove area from taillight to taillight as well as the trunk latch was painted with a dark gray and aqua "spatter paint." Overspray would also cover a portion of the trunk hinge brace as shown in the left photo. The fuel vent tube and wiring were not covered as they were installed after painting.
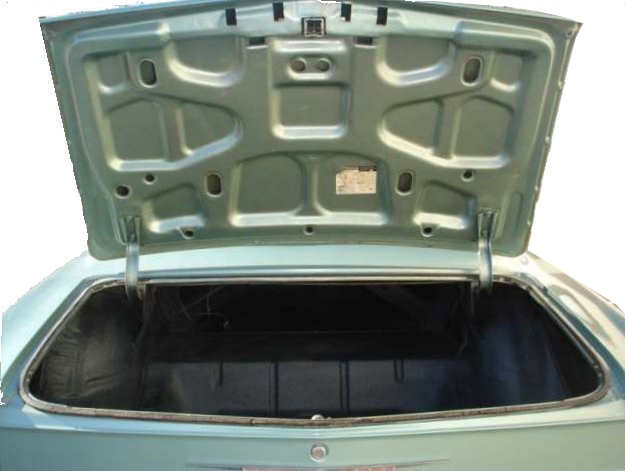
Both the 1966 and 1967 Chevelles use the same trunk lid. On the 1967 model year the Malibu and SS also received a molding trim piece that required stubs to be spot welded to the lid in order to mount the molding.
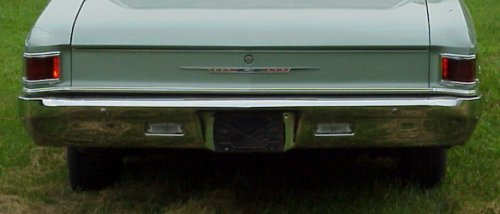
Note the lack of trunk lid trim molding on this 300 Deluxe; the 300
series was also without the trim molding.
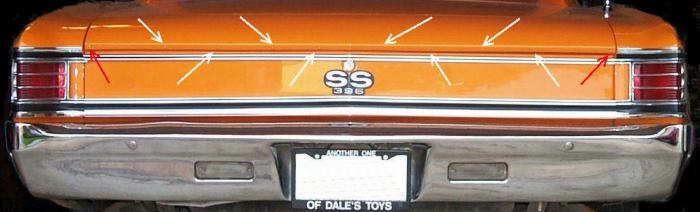
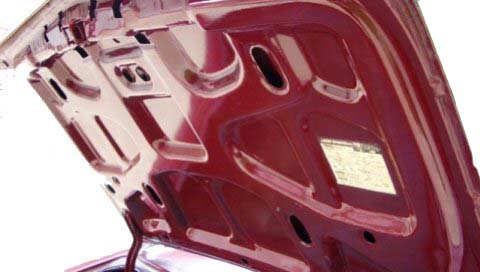
Note posts required to mount the trim molding on the trunk lid on the
Malibu & SS 396. Hard to see but there are 8 posts (studs) on the
trunk lid, indicated by the white arrows, and two holes, one on either
end as indicated by the red arrows. The trunk lid trim has slotted areas
to slide over the posts and two clips that snap into the holes.
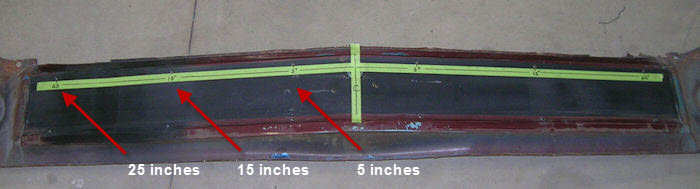
Upper and lower cove trim on the Malibu/SS 396 series has 6 mounting
holes. Shown here are the locations of these holes as measured from
the centerline of the trunk lock. The lower holes are the same measurements
as the upper holes.
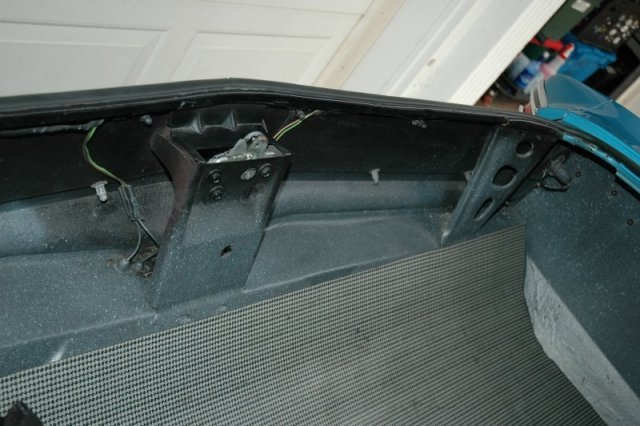
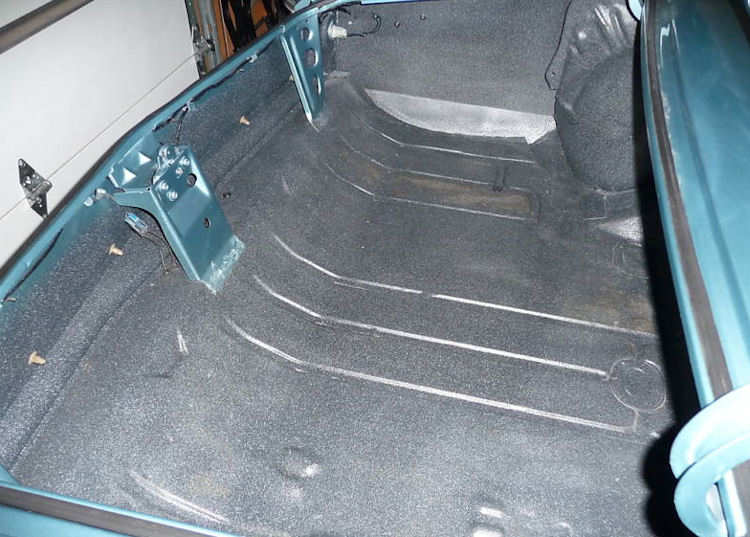
Application of spatter paint was haphazard at best. That is, areas were not specifically masked off to eliminate overspray. Compare an original trunk above to the restored trunk below. Note how the braces do not have any overspray.
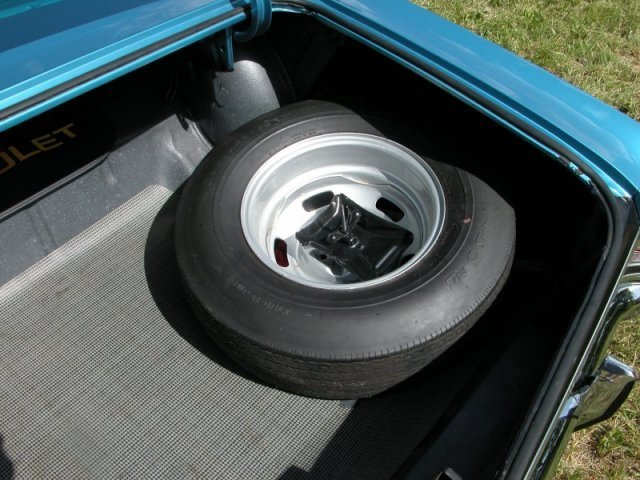
Note the spare tire mounting in the next photo. It is correct according to the AIM; the tire valve stem should be facing the jack assembly (i.e., tire valve stem down). On station wagons and El Caminos the wheel is positioned so the tire valve stem faces jack assembly with the jack assembly toward the outside of the body on the station wagon and towards the rear bulkhead on the El Camino. In all cases, the back side of the wheel should be visible. When a tire cover was used on the Custom El Camino, the cover was furnished by Fisher Body and installed by Chevrolet when spare tire was mounted during final assembly.
Kansas City SS 396 June 4th week.
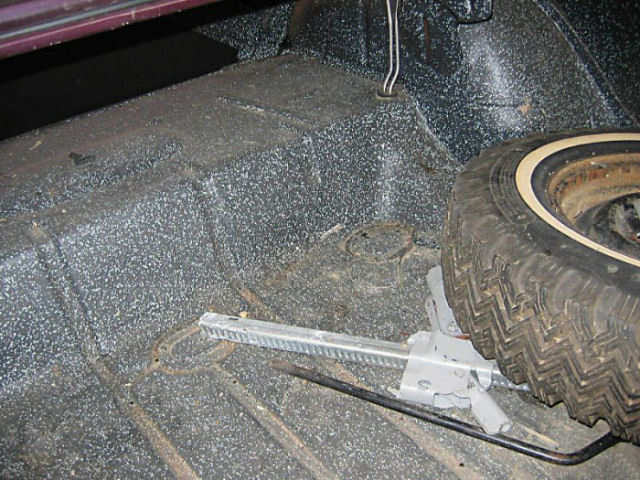
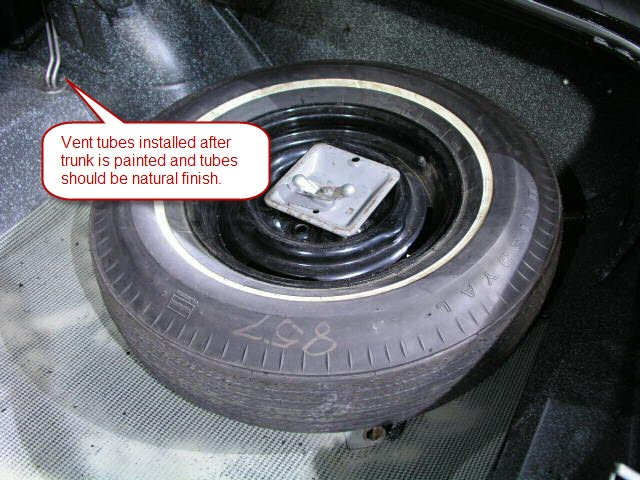
Although the wheel is mounted upside down (as per the AIM) the focus
here is on the fuel tank vent tubes. These were installed after the
trunk was painted and should be a natural finish. If they are painted
with the same spatter paint as the trunk, it's an indication the tubes
were present when trunk was painted during restoration or refresh.
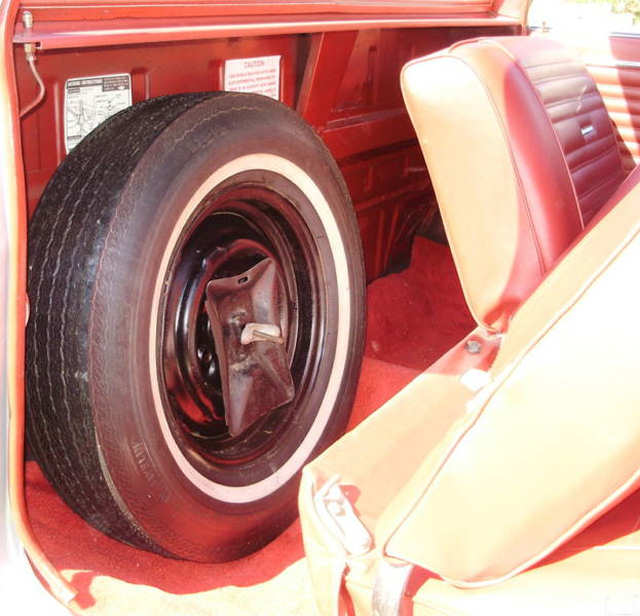
This El Camino spare is mounted incorrectly, valve stem and jack assembly
should face to the bulkhead. Note jacking instruction decal and Positraction
label.
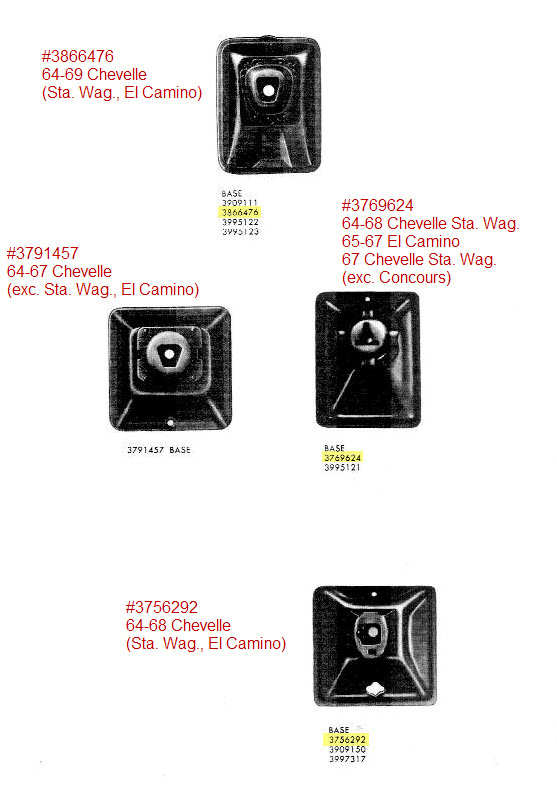
Several jack base assembly units are shown in the 1972 Chevrolet Parts &
Accessory manual.
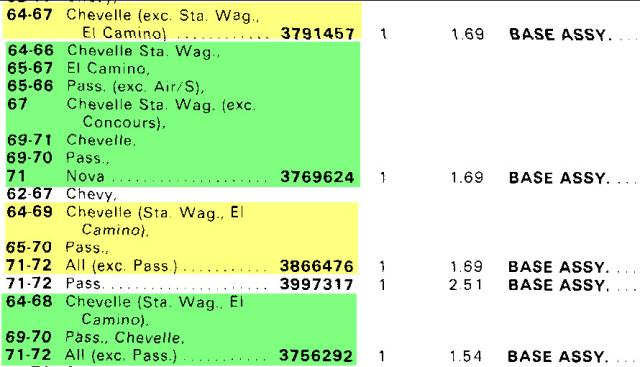

Only one part number is shown for the bracket assembly for 1967, #3897539.
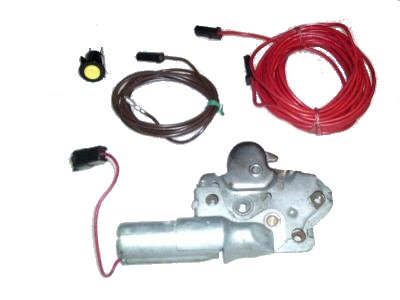
Even a power trunk lid release was available under RPO A91 but was cancelled
March 28, 1967.
The rear cove of all SS 396 models were painted a satin black, regardless of body color. All other series were painted the same color as the lower body. The SS 396 also included the SS 396 emblem centered between the tail lamps. The Chevelle 300 featured a "CHEVELLE" nameplate centered in the rear cove, the 300 Deluxe featured a center positioned Chevrolet emblem and no bright trim around the tail lamps, lower cove area or the trunk lip. The Malibu series received a rectangular emblem on the right side of the cove with the word "CHEVELLE" in chrome against a black background as well as the same bright trim around the tail lamps and black accented bright trim on the lower cove area and the trunk lip as the SS 396. The rear cove was a popular location to for the dealer to mount their badging as seen on the left side of the cove of the gold Malibu.
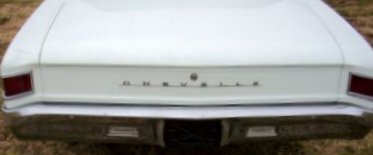
On the Chevelle 300 the rear cove is painted lower body color. Note
the minimal bright trim on the tail lamps but not along the bottom
of the cove nor trunk lip. An elongated C__H__E__V__E__L__L__E
script nameplate graced the center of the cove.
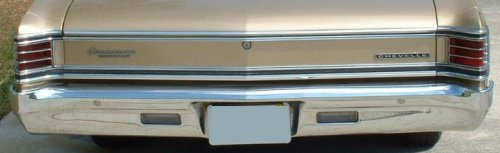
On the Chevelle 300 Deluxe the rear cove is painted lower body color.
Note the minimal bright trim on the tail lamps and along the bottom
of the cove but not trunk lip. A Chevrolet emblem graced the center
of the cove.
The Malibu the rear cove is painted lower body color. The tail lamp
and trim between the tail lamps & the trunk lip are the same as
the SS 396. A C_H_E_V_E_L_L_E nameplate graced the right
side of the cove.
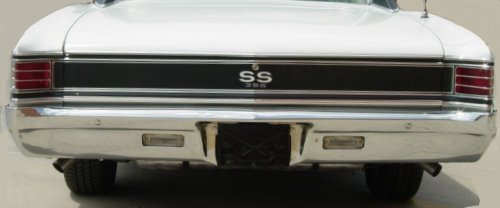
On the SS 396 the rear cove is painted satin black. The only emblem appearing
is the SS 396 centered in the cove.
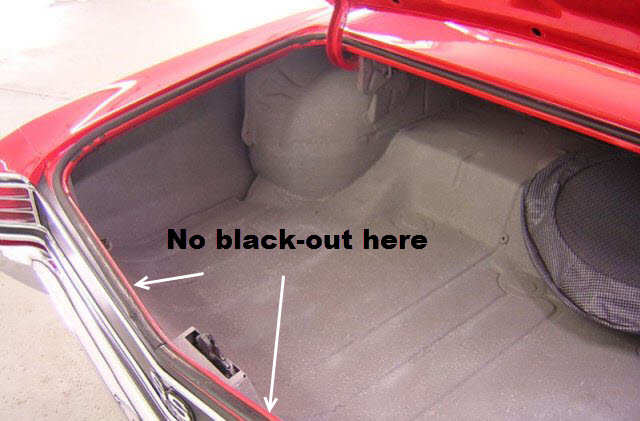
Note the body color area below trunk and above upper molding showing
this area is not blacked out as it should be.
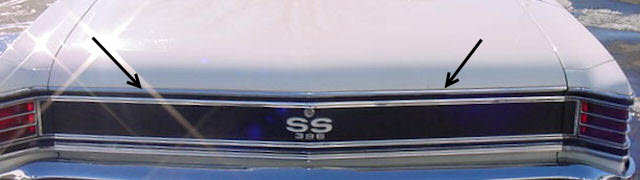
Note difference when done correctly.